Coleslaw is impossible to make.
What I mean is, coleslaw recipes vary so widely. People use mustard or no mustard, add other vegetables, make it tangy or sweet or both or neither. It can be sloppy and wet or dry and barely dressed.
It's always a gamble ordering coleslaw at restaurants because you never know what you're going to get and if you'll like it. And the same principle applies to coleslaw recipes. I mean, if you know you like a mustardy slaw or a creamy one, you can look at recipes that look like they'll result in the kind you prefer. But it's hard to tell.
I do know I usually like KFC coleslaw. It's a bit too sweet and sometimes a little gloppy, but overall it has a list of things I like--finely chopped cabbage, a touch of carrot and onion, creamy and sweet but still with some tang.
So when I went to make my own coleslaw with some of the bounty of CSA cabbage in my refrigerator, I went hunting for the KFC recipe. And if you want to clone a restaurant's recipe, you go to the Top Secret Recipes website.
I made a couple changes, and the resulting slaw--is very KFC-like.
KFC-Style Coleslaw
Adapted from Top Secret Recipes.
Gluten Free
Grain Free
Vegetarian
Use your food processor to finely shred two small or one medium heads of cabbage and two carrots or a generous handful of baby carrots.
Use the food processor to mince an onion (red preferred) and add 2 Tablespoons minced onion.
Mix the vegetables together in a large bowl.
In another bowl, combine 1/2 cup mayonnaise, between 1/4 to 1/3 cup sugar, 1/4 cup milk, 1/4 cup buttermilk (I used the lemon-juice-in-milk trick), 2 1/2 Tablespoons lemon juice, scant 2 1/2 Tablespoons white vinegar, 1/2 teaspoon salt, and 1/8 teaspoon pepper. Combine. I like to put the ingredients in the tall cylinder that came with my immersion blender and then use the immersion blender to blend everything. This ensures that the mayonnaise gets thoroughly mixed without leaving big chunks of mayo in the dressing.
Pour dressing over the vegetables and mix well.
Cover and refrigerate at least two hours before serving.
The verdict? It really does taste like KFC coleslaw, only slightly tangier and a little less sweet. The only problem is that I used homemade mayo and my recipe has a bit of dried mustard in it, so the coleslaw ended up tasting mustardy, which is exactly what I didn't want. SIGH. I wasn't thinking about the tiny bit of mustard in the batch of mayo, but it comes through really strongly. So if you're using homemade mayonnaise, leave the mustard out of it! But if you're using storebought, I'm sure it will taste exactly right.
Showing posts with label summer. Show all posts
Showing posts with label summer. Show all posts
Thursday, September 5, 2013

Tuesday, September 3, 2013
Miscellaneous Summer Food Projects
I've actually been getting better at blogging the meals we've been eating, but here's a little taste (sorry) of some of the other food projects I've been working on:
Sourdough Starter
I've been feeding a sourdough culture for a couple months now. I've used it to make delicious sourdough pancakes, amazing sourdough English muffins, and two giant bricks that were supposed to be bread.
Canning
The DDH and I (well, mostly the DDH, honestly, while I ran baby-control) pickled a couple pounds of jalapenos and some cucumbers. He loves the results; I don't. I think it's the pickling spice he used.
Other Preservation
I've turned tomatoes into sauce and tossed it in the freezer. I've been chopping and freezing jalapenos and strawberries, roasting, skinning, and freezing green chile, and blanching and freezing basil. This bit of work now will make the winter so much tastier!
CSA
We've been loving our CSA share from my friend Don at Bootstrap Farm. Most of the jalapenos and some of the green chiles have come from the CSA, as have all the cucumbers, basil, and most of the other produce I've mentioned (the strawberries, though, were just on sale at Aldi). It's great to pick up a giant bag of tasty, local, organic produce every week that I've already paid for. :-) It's forced me to get creative in the kitchen and try out some new recipes, from fried okra to eggplant parmesan and more.
Bone Broth
I made my monthly-ish chicken and bone broth batch this past week. This is seriously one of the best things I can advise anyone to do in the kitchen. Roast a chicken (I use the crockpot because it's easy, but I make the World's Best Roasted Chicken in the oven). The meat gets used for meals immediately and/or shredded and frozen for quick meals later. All the bones, organ meats, skin, etc. get dumped back in the crockpot and turned into delicious bone broth, which I also freeze. Whenever you see a recipe on here that calls for chicken broth or stock, this is what I use. It's practically free, delicious, and super good for you--stock from the store (or bouillon) is none of those things.
Sourdough Starter
I've been feeding a sourdough culture for a couple months now. I've used it to make delicious sourdough pancakes, amazing sourdough English muffins, and two giant bricks that were supposed to be bread.
Canning
 |
| Pickled jalapenos and pickles. |
Other Preservation
 |
| Blanched basil drying before being frozen. |
CSA
 |
| Fried okra. |
 |
| Delicious CSA watermelon. |
We've been loving our CSA share from my friend Don at Bootstrap Farm. Most of the jalapenos and some of the green chiles have come from the CSA, as have all the cucumbers, basil, and most of the other produce I've mentioned (the strawberries, though, were just on sale at Aldi). It's great to pick up a giant bag of tasty, local, organic produce every week that I've already paid for. :-) It's forced me to get creative in the kitchen and try out some new recipes, from fried okra to eggplant parmesan and more.
Bone Broth
I made my monthly-ish chicken and bone broth batch this past week. This is seriously one of the best things I can advise anyone to do in the kitchen. Roast a chicken (I use the crockpot because it's easy, but I make the World's Best Roasted Chicken in the oven). The meat gets used for meals immediately and/or shredded and frozen for quick meals later. All the bones, organ meats, skin, etc. get dumped back in the crockpot and turned into delicious bone broth, which I also freeze. Whenever you see a recipe on here that calls for chicken broth or stock, this is what I use. It's practically free, delicious, and super good for you--stock from the store (or bouillon) is none of those things.
So that's what I've been up to in the kitchen this summer--how about you?
Friday, August 23, 2013
White Bean Tacos
So, I have a confession to make.
About a month ago, a storm knocked out power to our house for almost forty-eight hours. When it became clear that the power wasn't coming back any time soon, I packed the meat into coolers with ice and took them to my in-laws' house, where at least they would be in the air conditioning (she only has the one side-by-side freezer and it's so packed I can barely fit a bottle of milk in there for when she watches T-Rex, so our food clearly wasn't going to fit in the actual freezer).
Luckily everything still seemed pretty frozen by the time our power came back and we could get it back to our freezer, but for various logistical reasons, the DDH took the meat back on his way to work. And since he was in a rush, he just piled everything, still wet from the ice in the cooler, into the freezer in no particular order.
This was about a month ago, and I still haven't managed to go out and reorganize the thing. Every time I need some meat or chicken broth or whatever, I have to pry it apart since everything is frozen together in big chunks. Sometimes the plastic rips and then I have to use up two things of meat. The freezer itself has big weird chunks of ice in it, because it's old and not frost free and all the frost melted and then refroze, sometimes around the meat that was put back in.
It's a mess. And so, honestly, I've kind of been avoiding cooking meals with meat in them, because it's such a project to find what I want and pry it out.
Hence these white bean tacos. They are actually quite delicious and DDH approved, but I'll be doubling the recipe next time since this only made enough for five or six tacos and we needed at least eight to cover dinner and lunch the next day.
You can also include some wilted spinach with the beans if you have those lying around.
A Note on Salt: I used dried beans that I had previously cooked and frozen, which are not salted. I wrote 1 teaspoon in the recipe but I think I might have used closer to two. If you are using canned beans, you may wish to start with less salt and add more to taste, since even rinsed, canned beans are more salty than dried.
White Bean Tacos
Gluten free (with corn tortillas)
Dairy free
Vegetarian (depending on tortillas)
Vegan (depending on tortillas)
Heat 1 Tablespoon oil over medium-high heat. Swirl to coat.
Add 1 onion, vertically sliced, and saute five minutes or until soft and lightly browned. Add 4 cloves garlic, minced and saute thirty seconds.
Add 2 cups white beans (1 15-ounce can, drained and rinsed) (cannellini are perfect), 1 teaspoon cumin, and 1 teaspoon salt. Stir. Cook two minutes or until beans are thoroughly heated. Feel free to let it simmer longer while you prepare the salsa, especially if there's still some liquid from the beans. Just be sure to turn the heat to low and stir occasionally so the beans don't burn.
In a small bowl, combine 1 1/2 cups chopped tomato, 1/4 teaspoon salt, 1 jalapeno, sliced, and 1 Tablespoon lime juice. You can add either fresh cilantro here or two teaspoons dried cilantro to the beans.
Warm flour or corn tortillas. You can do this by covering them with a damp paper towel and microwaving for about thirty seconds, or, if you prefer them crispy and delicious (my preferred method), heat in a dry skillet for two minutes or so on each side (you'll have to check to make sure they brown and don't burn). This is how I prep tortillas for just about everything I make and I much prefer it to the microwave method, but since you have to do it one at a time it does take longer if you're cooking for a crowd.
Fill each taco with bean mixture. Grate cheese (we usually use Colby-Jack) onto each serving, then top with a spoonful or two of salsa.
Enjoy!
About a month ago, a storm knocked out power to our house for almost forty-eight hours. When it became clear that the power wasn't coming back any time soon, I packed the meat into coolers with ice and took them to my in-laws' house, where at least they would be in the air conditioning (she only has the one side-by-side freezer and it's so packed I can barely fit a bottle of milk in there for when she watches T-Rex, so our food clearly wasn't going to fit in the actual freezer).
Luckily everything still seemed pretty frozen by the time our power came back and we could get it back to our freezer, but for various logistical reasons, the DDH took the meat back on his way to work. And since he was in a rush, he just piled everything, still wet from the ice in the cooler, into the freezer in no particular order.
This was about a month ago, and I still haven't managed to go out and reorganize the thing. Every time I need some meat or chicken broth or whatever, I have to pry it apart since everything is frozen together in big chunks. Sometimes the plastic rips and then I have to use up two things of meat. The freezer itself has big weird chunks of ice in it, because it's old and not frost free and all the frost melted and then refroze, sometimes around the meat that was put back in.
It's a mess. And so, honestly, I've kind of been avoiding cooking meals with meat in them, because it's such a project to find what I want and pry it out.
Hence these white bean tacos. They are actually quite delicious and DDH approved, but I'll be doubling the recipe next time since this only made enough for five or six tacos and we needed at least eight to cover dinner and lunch the next day.
You can also include some wilted spinach with the beans if you have those lying around.
A Note on Salt: I used dried beans that I had previously cooked and frozen, which are not salted. I wrote 1 teaspoon in the recipe but I think I might have used closer to two. If you are using canned beans, you may wish to start with less salt and add more to taste, since even rinsed, canned beans are more salty than dried.
White Bean Tacos
Gluten free (with corn tortillas)
Dairy free
Vegetarian (depending on tortillas)
Vegan (depending on tortillas)
Heat 1 Tablespoon oil over medium-high heat. Swirl to coat.
Add 1 onion, vertically sliced, and saute five minutes or until soft and lightly browned. Add 4 cloves garlic, minced and saute thirty seconds.
Add 2 cups white beans (1 15-ounce can, drained and rinsed) (cannellini are perfect), 1 teaspoon cumin, and 1 teaspoon salt. Stir. Cook two minutes or until beans are thoroughly heated. Feel free to let it simmer longer while you prepare the salsa, especially if there's still some liquid from the beans. Just be sure to turn the heat to low and stir occasionally so the beans don't burn.
In a small bowl, combine 1 1/2 cups chopped tomato, 1/4 teaspoon salt, 1 jalapeno, sliced, and 1 Tablespoon lime juice. You can add either fresh cilantro here or two teaspoons dried cilantro to the beans.
Warm flour or corn tortillas. You can do this by covering them with a damp paper towel and microwaving for about thirty seconds, or, if you prefer them crispy and delicious (my preferred method), heat in a dry skillet for two minutes or so on each side (you'll have to check to make sure they brown and don't burn). This is how I prep tortillas for just about everything I make and I much prefer it to the microwave method, but since you have to do it one at a time it does take longer if you're cooking for a crowd.
Fill each taco with bean mixture. Grate cheese (we usually use Colby-Jack) onto each serving, then top with a spoonful or two of salsa.
Enjoy!
Tuesday, August 20, 2013
Cabbage and Tomato Soup
Soups are a winter standby meal. There's not much easier than chopping up some vegetables and meat and tossing them in a pot, and hot soup makes a comforting meal on a cold winter's day.
I don't usually make as many soups in the summer (neither the DDH nor I are fans of chilled soups), but I did yesterday, and I realized something that probably should have been obvious: just as with all other preparations of vegetables, soups taste completely different when made with summer-fresh produce than with winter-stored or canned stuffs.
I guess I thought that when you're boiling the heck out of something, it doesn't much matter how fresh it is. And that's true, in that a flavorful broth can make less-than-stellar produce still taste pretty darn good.
But soup made with fresh produce? Tastes even better. Or at least different.
This soup would be vegetarian with vegetable broth instead of chicken, but would also benefit from some chicken, or some sausage, browned and thrown in at the end. The DDH went for seconds even without meat, so it's plenty tasty and fairly hearty without it.
I used fresh tomatoes (the real source of the flavor difference--there's nothing like a garden fresh tomato no matter how it's prepared, but potatoes and cooked cabbage, I think, are pretty much the same always. Though actually the potatoes really had a nice flavor in this, too. Anyway.), but in the winter would usually use a can or two of diced tomatoes, so feel free to substitute. I used two big and several small tomatoes; I'm guessing it ran about a half pound or so.
As with most vegetable soups, you can switch around the vegetables easily. Add some carrots or parsnip or green beans or whatever you have lying around.
Cabbage and Tomato Soup
Gluten Free
Dairy Free
Vegetarian (with vegetable broth)
Vegan (with vegetable broth)
Heat a tablespoon or so of oil in a large pot on medium high heat.
Add 1 onion, chopped and 1 small head of cabbage, cored and thinly sliced. I forgot to add any garlic because T-Rex was trying to pour the dog's water bowl out all over the kitchen again, but you really should include 3 cloves garlic.
Cook, stirring occasionally, for 8-10 minutes or until onion is soft and cabbage is getting there.
Add 1/2 pound tomatoes, diced, 2 teaspoons salt, 1 teaspoon cumin, 4 cups chicken broth, and enough water to finish covering the vegetables, if necessary.
Bring to a boil. Turn heat to low and simmer for about an hour or until potatoes and cabbage are tender.
Enjoy!
I don't usually make as many soups in the summer (neither the DDH nor I are fans of chilled soups), but I did yesterday, and I realized something that probably should have been obvious: just as with all other preparations of vegetables, soups taste completely different when made with summer-fresh produce than with winter-stored or canned stuffs.
I guess I thought that when you're boiling the heck out of something, it doesn't much matter how fresh it is. And that's true, in that a flavorful broth can make less-than-stellar produce still taste pretty darn good.
But soup made with fresh produce? Tastes even better. Or at least different.
This soup would be vegetarian with vegetable broth instead of chicken, but would also benefit from some chicken, or some sausage, browned and thrown in at the end. The DDH went for seconds even without meat, so it's plenty tasty and fairly hearty without it.
I used fresh tomatoes (the real source of the flavor difference--there's nothing like a garden fresh tomato no matter how it's prepared, but potatoes and cooked cabbage, I think, are pretty much the same always. Though actually the potatoes really had a nice flavor in this, too. Anyway.), but in the winter would usually use a can or two of diced tomatoes, so feel free to substitute. I used two big and several small tomatoes; I'm guessing it ran about a half pound or so.
As with most vegetable soups, you can switch around the vegetables easily. Add some carrots or parsnip or green beans or whatever you have lying around.
Cabbage and Tomato Soup
Gluten Free
Dairy Free
Vegetarian (with vegetable broth)
Vegan (with vegetable broth)
Heat a tablespoon or so of oil in a large pot on medium high heat.
Add 1 onion, chopped and 1 small head of cabbage, cored and thinly sliced. I forgot to add any garlic because T-Rex was trying to pour the dog's water bowl out all over the kitchen again, but you really should include 3 cloves garlic.
Cook, stirring occasionally, for 8-10 minutes or until onion is soft and cabbage is getting there.
Add 1/2 pound tomatoes, diced, 2 teaspoons salt, 1 teaspoon cumin, 4 cups chicken broth, and enough water to finish covering the vegetables, if necessary.
Bring to a boil. Turn heat to low and simmer for about an hour or until potatoes and cabbage are tender.
Enjoy!
Tuesday, August 21, 2012
Lemony Orzo Salad with Fresh Veggies and Goat Cheese
Last week, I made this same salad with chicken and frozen vegetables. With the chicken, it made a great one-dish entree.
This week, I made the same thing but with some fresh veggies and goat cheese but no chicken. This vegetarian version is more of a side dish and makes a more frugal version to bring to potlucks. It's also a good way to use up fresh veggies you may have lying around.
The dish is a quick one to make even when you're cooking chicken, but once you eliminate that step, it's ridiculously speedy. I reluctantly set my book down at 5:10 p.m., let the dogs in, looked up the recipe, cooked it, changed into my gym clothes, turned on the printer computer, force the snail-computer to open up my meeting agenda, make some changes, set it to printing, and was out the door for Zumba by 5:50 p.m. Obviously some multi-tasking was involved here, but orzo takes less than ten minutes to cook and nothing else takes long, either.
There's enough of a difference in how you deal with some of the vegetables that I thought I might as well write another post, but be sure to check out the original to see another riff on the same basic recipe with some tips regarding other ways to vary it.
Lemony Orzo-Vegetable Salad with Goat Cheese
Adapted from Cooking Light, July 2010
Cook 3/4 cup
orzo according to package directions. Drain, rinse with cold water
(to help keep the pasta from clumping together), and set aside.
While the pasta cooks, make the dressing.
For the dressing, combine 1/4 tsp. lemon zest; 3 Tbs. lemon juice*; 1 Tbs. extra-virgin olive oil; 1/2 tsp. salt; 2-3 cloves garlic, minced; 1/4 tsp. honey, and 1/8 tsp. black pepper
in a small bowl or dressing
container.
Whisk or shake until
emulsified.
Once the orzo is cooked, put it in a large bowl
and add your vegetables. For this version, instead of using frozen vegetables, I wanted to use some grape tomatoes and a bumpy yellow squash I got at the farmer's market on Saturday.
Tomatoes work great in this dish raw. Just rinse them off, cut any big ones into bite-sized pieces, and add them to the cooked orzo. I used about 1 1/2 cups grape tomatoes.
Smooth-skinned squash could be addred raw, but the bumpy-skinned ones are a little tougher; you'll want to sautee them first.
Heat a little less than 1 Tbs. oil (coconut, olive oil, butter) in a large skillet.
Thinly slice 1 medium yellow squash. Add to the hot oil.
Cover
and steam-sautee for five to ten minutes or until squash is soft.
Add to the orzo and tomatoes.
Drizzle with dressing and toss to coat.
As with the chicken version, this tastes best after being allowed to sit and marinate for awhile.
Before serving, crumble 2 oz. goat cheese on top and stir in.
Enjoy!
This week, I made the same thing but with some fresh veggies and goat cheese but no chicken. This vegetarian version is more of a side dish and makes a more frugal version to bring to potlucks. It's also a good way to use up fresh veggies you may have lying around.
The dish is a quick one to make even when you're cooking chicken, but once you eliminate that step, it's ridiculously speedy. I reluctantly set my book down at 5:10 p.m., let the dogs in, looked up the recipe, cooked it, changed into my gym clothes, turned on the printer computer, force the snail-computer to open up my meeting agenda, make some changes, set it to printing, and was out the door for Zumba by 5:50 p.m. Obviously some multi-tasking was involved here, but orzo takes less than ten minutes to cook and nothing else takes long, either.
There's enough of a difference in how you deal with some of the vegetables that I thought I might as well write another post, but be sure to check out the original to see another riff on the same basic recipe with some tips regarding other ways to vary it.
Lemony Orzo-Vegetable Salad with Goat Cheese
Adapted from Cooking Light, July 2010
 |
| Orzo. |
While the pasta cooks, make the dressing.
For the dressing, combine 1/4 tsp. lemon zest; 3 Tbs. lemon juice*; 1 Tbs. extra-virgin olive oil; 1/2 tsp. salt; 2-3 cloves garlic, minced; 1/4 tsp. honey, and 1/8 tsp. black pepper
 |
| Dressing ingredients. |
 |
| Layers. |
 |
| No layers. |
Once the orzo is cooked, put it in a large bowl
 |
| Bowl o' orzo. |
Tomatoes work great in this dish raw. Just rinse them off, cut any big ones into bite-sized pieces, and add them to the cooked orzo. I used about 1 1/2 cups grape tomatoes.
Smooth-skinned squash could be addred raw, but the bumpy-skinned ones are a little tougher; you'll want to sautee them first.
Heat a little less than 1 Tbs. oil (coconut, olive oil, butter) in a large skillet.
Thinly slice 1 medium yellow squash. Add to the hot oil.
 |
| Raw squashes. |
 |
| Cooking squashes. |
 |
| Soft cooked squashes. |
Drizzle with dressing and toss to coat.
As with the chicken version, this tastes best after being allowed to sit and marinate for awhile.
Before serving, crumble 2 oz. goat cheese on top and stir in.
Enjoy!
Wednesday, August 15, 2012
Lemony Orzo-Vegetable Salad with Chicken
I am obsessed with orzo.
I mean, not really. But I love it. It's pasta, but pasta in funny little rice-sized pieces. The texture appeals to me.
Orzo is perfect for pasta salads. It cooks quickly and tastes good hot or cold. Which, of course, makes it an excellent summer dish, as well as a great make-ahead meal or potluck supper option.
This recipe is fast and easy. But though it comes together quickly, it tastes best after it sits awhile. I ate my portion hot off the stove last night and was a bit disappointed.
"The DDH is going to hate this," I thought. "It's bland and boring." (The DDH often thinks my food is bland. I tell him this is because I have a more refined and sensitive palate than he does. He and my mom both say it's because I like bland foods. I argue that I like bland foods because my refined and sensitive palate distinguishes flavor nuances unfathomable to boors such as they. They disagree. Etc.)
The DDH came home and ate his portion of the orzo salad an hour or so later. And the DDH did not hate it. The DDH told me it was delicious. So did our friend, who came sniffing around and asked for some even though it was after dinnertime, because twenty-something boys are a lot like teenage boys and are always hungry. One of the DDH's co-workers asked for the recipe based on the smell alone (hi, coworker!). Obviously, the marinated-for-awhile salad was not at all bland, but instead delicious.
So here you go.
Lemony Orzo-Vegetable Salad with Chicken
Adapted from Cooking Light, July 2010
Cook 3/4 cup orzo according to package directions. Drain, rinse with cold water (to help keep the pasta from clumping together), and set aside.
Meanwhile, heat about 1 Tbs. oil (I used coconut, but olive oil or butter would work, too) in a large pan.
Cut 1 pound boneless skinless chicken breast into bite-sized pieces.
Toss your chicken into the hot pan. Cook on high for two minutes or so until browned, then turn heat down to low and cook until chicken is done, about five to eight more minutes.
For the dressing, combine 1/4 tsp. lemon zest*; 3 Tbs. lemon juice*; 1 Tbs. extra-virgin olive oil; 1/2 tsp. salt; 2-3 cloves garlic, minced; 1/4 tsp. honey, and 1/8 tsp. black pepper
in a small bowl or dressing container.
Whisk or shake until emulsified.
Now, for veggies, you have some options. One is to cut up any delicious fresh veggies you have on hand and toss them in raw. This works with tomatoes, summer squash, zucchini, cucumber, peppers, etc. For crunchier veggies (carrots, broccoli, etc.), you should probably steam them first to soften them.
However. Honestly, I steamed up a bag of cut mixed veggies from Sam's Club. The one with the green beans and peas and little cubes of carrot. The veggies are already conveniently bite-sized and will mix well with the orzo and dressing.
Use whatever you have on hand, but obviously a tomato-cucumber version (perhaps with some feta or goat cheese?) will be sort of a completely different dish than a green bean-carrot-corn version.
Put your orzo in a large bowl.
Drizzle the dressing over the pasta and toss well.
Then add your cooked chicken
and veggies
and stir to combine.
Ta-da! You can eat this now or let it sit, at room temperature or in the fridge, for an hour. Reheat or eat cold. Serve with a spoon (word from the wise: orzo is hard to eat with a fork).
*Note: In a raw application like a salad dressing, fresh lemon juice and zest will taste miles better than bottled juice. This doesn't mean bottled juice won't do in a pinch, but it will not taste the same! I suggest always buying an extra lemon or two each time you buy some for a recipe that calls for a lot of lemon juice (lemon squares, for example). Squeeze the extras and freeze all your juice in ice cube trays. Once frozen, pop them out and store in bags or containers in the freezer. It's not quite as good as fresh juice, but better than bottled. I freeze extra zest, too.
I mean, not really. But I love it. It's pasta, but pasta in funny little rice-sized pieces. The texture appeals to me.
Orzo is perfect for pasta salads. It cooks quickly and tastes good hot or cold. Which, of course, makes it an excellent summer dish, as well as a great make-ahead meal or potluck supper option.
This recipe is fast and easy. But though it comes together quickly, it tastes best after it sits awhile. I ate my portion hot off the stove last night and was a bit disappointed.
"The DDH is going to hate this," I thought. "It's bland and boring." (The DDH often thinks my food is bland. I tell him this is because I have a more refined and sensitive palate than he does. He and my mom both say it's because I like bland foods. I argue that I like bland foods because my refined and sensitive palate distinguishes flavor nuances unfathomable to boors such as they. They disagree. Etc.)
The DDH came home and ate his portion of the orzo salad an hour or so later. And the DDH did not hate it. The DDH told me it was delicious. So did our friend, who came sniffing around and asked for some even though it was after dinnertime, because twenty-something boys are a lot like teenage boys and are always hungry. One of the DDH's co-workers asked for the recipe based on the smell alone (hi, coworker!). Obviously, the marinated-for-awhile salad was not at all bland, but instead delicious.
So here you go.
 |
| Lemony Orzo-Vegetable Salad with Chicken |
Lemony Orzo-Vegetable Salad with Chicken
Adapted from Cooking Light, July 2010
|
| Orzo. |
Meanwhile, heat about 1 Tbs. oil (I used coconut, but olive oil or butter would work, too) in a large pan.
 |
| It was actually finally cool enough in the house that the coconut oil started out semi-solid! |
 |
| Chicken. |
For the dressing, combine 1/4 tsp. lemon zest*; 3 Tbs. lemon juice*; 1 Tbs. extra-virgin olive oil; 1/2 tsp. salt; 2-3 cloves garlic, minced; 1/4 tsp. honey, and 1/8 tsp. black pepper
|
| Dressing ingredients. |
|
| Layers. |
|
| No layers. |
However. Honestly, I steamed up a bag of cut mixed veggies from Sam's Club. The one with the green beans and peas and little cubes of carrot. The veggies are already conveniently bite-sized and will mix well with the orzo and dressing.
Use whatever you have on hand, but obviously a tomato-cucumber version (perhaps with some feta or goat cheese?) will be sort of a completely different dish than a green bean-carrot-corn version.
Put your orzo in a large bowl.
|
| Bowl o' orzo. |
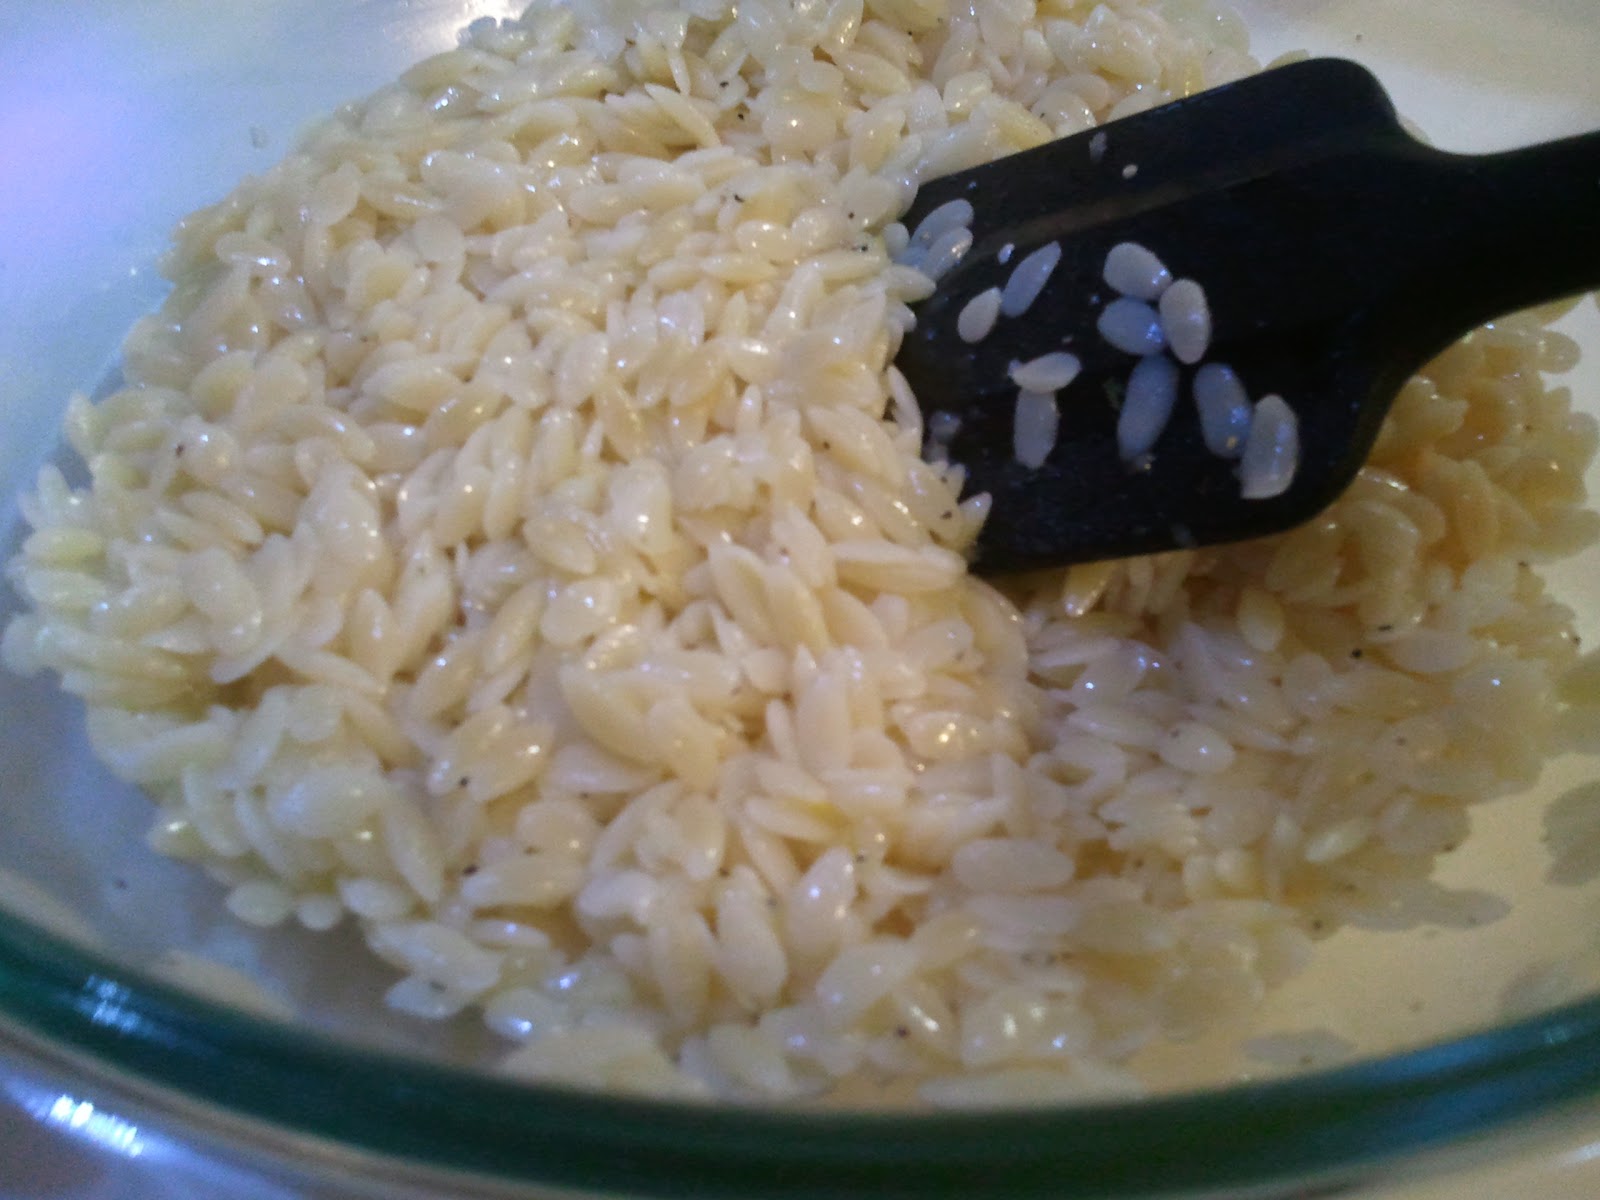 |
| Admittedly, you can't see a difference in the picture. |
 |
| Lots of beige. |
 |
| Color! |
 |
| Finito. |
Ta-da! You can eat this now or let it sit, at room temperature or in the fridge, for an hour. Reheat or eat cold. Serve with a spoon (word from the wise: orzo is hard to eat with a fork).
*Note: In a raw application like a salad dressing, fresh lemon juice and zest will taste miles better than bottled juice. This doesn't mean bottled juice won't do in a pinch, but it will not taste the same! I suggest always buying an extra lemon or two each time you buy some for a recipe that calls for a lot of lemon juice (lemon squares, for example). Squeeze the extras and freeze all your juice in ice cube trays. Once frozen, pop them out and store in bags or containers in the freezer. It's not quite as good as fresh juice, but better than bottled. I freeze extra zest, too.
Thursday, August 9, 2012
Just Tomatoes Sauce for Freezing
I've been remiss in posting, but not in cooking! I've been up to all kinds of shenanigans in the kitchen, including impromptu bagel French toast Sunday that I should have documented for posterity, but didn't.
So good.
Anyway. For those of you who haven't noticed, it's August (already!). What does August mean? Tomatoes! Technically the tail-end of the tomato season, especially considering the crazy heat we've been having in Oklahoma. But that just means there are lots and lots of delicious, juicy, but maybe not completely perfect tomatoes available at the Farmer's Market (and perhaps in a backyard near you)!
I love tomatoes. I tend to buy pounds and pounds of them this time of year--pounds and pounds that I can't possibly eat before they dissolve into icky tomato mush.
So I turn them into a basic tomato sauce for freezing. Fast, simple, no messing around with canning and acidity levels and botulism. I have plenty of room in my freezer for a few flat baggies of sauce. Because the sauce is unseasoned, it can be used in all kinds of recipes later--to add a tomatoey punch to taco meat, summer flavor to tomato soup, or, of course, as the base for all kinds of pasta sauces.
If canning intimidates you but you want to store up some of that summer-fresh produce for winter, do this. Trust me.
Just Tomatoes Sauce for Freezing
Adapted from this recipe at The Girl's Guide to Guns and Butter.
And by adapted, I actually mean that mine's just a smaller batch, I think.
Start with some tomatoes. It doesn't really matter how many you have; this will work fine with two pounds or ten, so long as you have an appropriately-sized pot.
Core the tomatoes and chop them into pieces. Large bite-sized pieces are about right; this might be quarters or eighths or halves, depending on how big your tomatoes are. Feel free to toss grape tomatoes in whole.
De-seed the tomatoes if you want, though I like them left in. Don't worry about the peels, as those will be shredded when you blend them anyway.
Put the tomatoes in a pot.
Sprinkle them with salt to taste (I tend to undersalt here since I use this sauce in such a variety of end dishes).
Add just a splash or two of water. You want enough to help the cooking get started, not dilute the flavor.
Bring to a simmer and cook, uncovered, 10 to 35 minutes. Yes, that's a wide time range, but remember I gave you a wide poundage range! Two pounds of tomatoes don't take long; ten pounds will take longer. The key is to get your tomatoes to look like this (feel free to beat them up with a potato masher if you'd like):
And finally this:
The tomatoes should break down and get juicy (I told you you didn't need to add much water), but shouldn't cook down or get thick.
Then it's time to blend! You have two options, depending on your available equipment: immersion blender or regular blender. Or, I guess, food processor.
To use a regular blender or food processor, pour your cooked and somewhat cooled tomatoes into said appliance and blend until smooth.
If you have an immersion blender (and you should, if you like sauces and soups and all other kinds of things), you can blend right in the pot. Or you can pour the cooked tomatoes into a bowl that's better shaped for pouring; this will make it easier to pour your sauce into plastic bags for freezing.
The sauce should be nice and smooth once blended.
Once the sauce is fully cooled, you're ready to bag and freeze it. You'll need freezer bags, not just storage bags. These use a thicker plastic and a better seal to keep everything fresh and tasty in the freezer.
You could always use plastic or glass containers with lids, too, of course, making sure to leave plenty of headroom for when the liquid expands as it freezes. I like plastic bags because they freeze flat and airtight, making them easy to store and keeping the sauce from getting freezer-burn.
Label your bag with the contents, amount, and date (so, not anything like the one in the picture).
My first small batch I used some of it fresh and had enough for about 1 1/2 cups of sauce for freezing. A second, larger batch yielded four two-cup bags o' sauce. I usually use about two cups of sauce in most recipes; if you have a different frequently used recipe size, feel free to adjust accordingly.
Just measure:
And pour into the plastic bag:
The original recipe has a nifty trick if you're doing several of these: prop your bags up inside a large pot so they'll all stay upright, making it easier to pour the sauce into the bags. Because this can get messy.
Seal the bag, pressing to remove as much air as possible. Then shimmy it around so it lies flat, like so:
You can stack bags on a cookie sheet to help them freeze flat, then line them up once they're frozen. The flat rectangle shape saves room in the freezer and thaws more quickly than a big pooled chunk.
And that's it! You now have summer-fresh tomato sauce for all your winter cooking needs.
So good.
Anyway. For those of you who haven't noticed, it's August (already!). What does August mean? Tomatoes! Technically the tail-end of the tomato season, especially considering the crazy heat we've been having in Oklahoma. But that just means there are lots and lots of delicious, juicy, but maybe not completely perfect tomatoes available at the Farmer's Market (and perhaps in a backyard near you)!
I love tomatoes. I tend to buy pounds and pounds of them this time of year--pounds and pounds that I can't possibly eat before they dissolve into icky tomato mush.
So I turn them into a basic tomato sauce for freezing. Fast, simple, no messing around with canning and acidity levels and botulism. I have plenty of room in my freezer for a few flat baggies of sauce. Because the sauce is unseasoned, it can be used in all kinds of recipes later--to add a tomatoey punch to taco meat, summer flavor to tomato soup, or, of course, as the base for all kinds of pasta sauces.
If canning intimidates you but you want to store up some of that summer-fresh produce for winter, do this. Trust me.
Just Tomatoes Sauce for Freezing
Adapted from this recipe at The Girl's Guide to Guns and Butter.
And by adapted, I actually mean that mine's just a smaller batch, I think.
Start with some tomatoes. It doesn't really matter how many you have; this will work fine with two pounds or ten, so long as you have an appropriately-sized pot.
Core the tomatoes and chop them into pieces. Large bite-sized pieces are about right; this might be quarters or eighths or halves, depending on how big your tomatoes are. Feel free to toss grape tomatoes in whole.
De-seed the tomatoes if you want, though I like them left in. Don't worry about the peels, as those will be shredded when you blend them anyway.
 |
| Chopped tomatoes. |
 |
| Potted tomatoes. |
Add just a splash or two of water. You want enough to help the cooking get started, not dilute the flavor.
 |
| Not much water at all. |
 |
| About halfway done. |
 |
| Done. |
The tomatoes should break down and get juicy (I told you you didn't need to add much water), but shouldn't cook down or get thick.
 |
| Cooked tomatoes. |
To use a regular blender or food processor, pour your cooked and somewhat cooled tomatoes into said appliance and blend until smooth.
If you have an immersion blender (and you should, if you like sauces and soups and all other kinds of things), you can blend right in the pot. Or you can pour the cooked tomatoes into a bowl that's better shaped for pouring; this will make it easier to pour your sauce into plastic bags for freezing.
 |
| Blending. |
 |
| Blended. |
Once the sauce is fully cooled, you're ready to bag and freeze it. You'll need freezer bags, not just storage bags. These use a thicker plastic and a better seal to keep everything fresh and tasty in the freezer.
You could always use plastic or glass containers with lids, too, of course, making sure to leave plenty of headroom for when the liquid expands as it freezes. I like plastic bags because they freeze flat and airtight, making them easy to store and keeping the sauce from getting freezer-burn.
Label your bag with the contents, amount, and date (so, not anything like the one in the picture).
 |
| You will want to label your bag better than this. |
Just measure:
 |
| Cup o' sauce. |
 |
| Like so. |
Seal the bag, pressing to remove as much air as possible. Then shimmy it around so it lies flat, like so:
 |
| Flat for storage. |
And that's it! You now have summer-fresh tomato sauce for all your winter cooking needs.
Tuesday, July 17, 2012
Lemony Lentil Salad
I love lentils.
Maybe that's a weird thing to say about this little legume. But it's true. I like the taste and the funny texture.
It's rare to find a food that's cheap, filling, healthy, and tasty, but lentils are all of those.
Dried lentils, like dried beans, are incredibly inexpensive, but they don't require soaking or long cooking times the way their bigger cousins do. So while I have a balance of cheap dried beans and more expensive, convenient canned beans in my pantry, with lentils I just buy dried.
I confess I've been in a bit of a rut cooking lentils, however. I add them to soups and stews to thicken them up, make them more filling and meaty without actually adding more meat. But I rarely do anything else with them.
At five o'clock yesterday afternoon, I had no meat defrosted, the thermometer read100 degrees, and a hungry DDH who needed leftovers for lunch the next day.
A quick perusal of the internets yielded an idea or two, which led to this: a summery cool vegetarian meal that even the DDH enjoyed.
I told you I love lentils.
Lemony Lentil Salad
Lentils roughly double in volume when cooked. I wanted about three cups cooked lentils, so I measured out 1 1/2 cups dried lentils. This would be an easy recipe to double (or halve) to serve to a crowd (or just yourself).
Put your lentils in a strainer and rinse with hot water. Paw through them and check for little stones or other debris. Alternatively, put the lentils in a bowl, cover with hot water, and drain. The latter method will get them cleaner; the former is quicker and uses fewer dishes.
Put the lentils in an appropriately sized pot and add twice as much water as you did lentils. So for 1 1/2 cups lentils, add 3 cups water. Warm or hot water is better.
Bring to a boil, then turn the heat down and simmer until done. The lentils will dramatically increase in volume, so add more water if you need to. It will take 15-45 minutes for your lentils to cook, depending on how old and dry they are, how high you keep the heat, etc.
While the lentils are cooking, mix up your dressing.
In a small bowl or a handy shaker thing like I have, add 1/3 cup lemon juice (a bit more than one lemon, unless your lemon is pretty big and juicy). (Tip: Squeeze two (or more) lemons, measure out the juice you need, and pour the rest into an ice cube tray. Freeze and pop out into a labeled bag; pull out whenever you need fresh lemon juice. The lemon juice I'm using is actually frozen leftover lemon juice rather than true fresh juice.)
Several sprigs fresh dill or 1+ teaspoon dried dill. Just add some, taste, and add more if necessary.
2 teaspoons Dijon mustard. Or brown mustard of your choice. Or yellow mustard, if you must. Or even some mustard seed or dried mustard, if you're out of the usual condiment.
1/4 teaspoon salt. Add more to taste.
Black pepper to taste.
1/3 cup extra virgin olive oil. (Read instructions below for how to add it to your dressing mixture!)
Now. If you're using a dressing shaker, you can just layer everything in there and shake vigorously for thirty seconds. If you're using a bowl, you'll want to s l o w l y add the olive oil while constantly whisking the mixture with a fork or whisk. You want your oil and acid to emulsify and turn creamy, not separate into lemon juice with a grease slick.
Chop any vegetables you'd like to add to your salad: tomatoes, cucumbers, onions, summer squash, blanched green beans, steamed broccoli...whatever you have lying around that you think would be tasty.
At some point in here your lentils will finish cooking. Drain the lentils and put into a large bowl.
Add your vegetables. I had a nice juicy red tomato
and a white onion.
Pour on your dressing and stir to combine.
Serve your lentil salad on top of lettuce, rice, or pasta--or all by itself! This would also make a nice accompaniment to a salmon filet or some other fish.
It occurs to me that some parmesan cheese grated on top of that would be divine.
We ate it room temperature last night and chilled for lunch today. I loved it. So good.
And the DDH? We all know that vegetarian recipes have to garner his approval if I want to make them again for general consumption. Luckily, he likes lentils (though not raw onion, oops), and lentils are filling and chewy enough to make up for meat. He ate a big bowl and expressed his approval (except for the raw onions). Success!
Maybe that's a weird thing to say about this little legume. But it's true. I like the taste and the funny texture.
It's rare to find a food that's cheap, filling, healthy, and tasty, but lentils are all of those.
Dried lentils, like dried beans, are incredibly inexpensive, but they don't require soaking or long cooking times the way their bigger cousins do. So while I have a balance of cheap dried beans and more expensive, convenient canned beans in my pantry, with lentils I just buy dried.
I confess I've been in a bit of a rut cooking lentils, however. I add them to soups and stews to thicken them up, make them more filling and meaty without actually adding more meat. But I rarely do anything else with them.
At five o'clock yesterday afternoon, I had no meat defrosted, the thermometer read100 degrees, and a hungry DDH who needed leftovers for lunch the next day.
A quick perusal of the internets yielded an idea or two, which led to this: a summery cool vegetarian meal that even the DDH enjoyed.
 |
| Lemony Lentil Salad. |
Lemony Lentil Salad
Lentils roughly double in volume when cooked. I wanted about three cups cooked lentils, so I measured out 1 1/2 cups dried lentils. This would be an easy recipe to double (or halve) to serve to a crowd (or just yourself).
 |
| Lentils. |
 |
| Rinsing--check for stones and grit. |
 |
| You should have way more water than in this picture. I just barely covered the lentils and had to add more water almost immediately. |
 |
| See how much the lentils have risen? |
In a small bowl or a handy shaker thing like I have, add 1/3 cup lemon juice (a bit more than one lemon, unless your lemon is pretty big and juicy). (Tip: Squeeze two (or more) lemons, measure out the juice you need, and pour the rest into an ice cube tray. Freeze and pop out into a labeled bag; pull out whenever you need fresh lemon juice. The lemon juice I'm using is actually frozen leftover lemon juice rather than true fresh juice.)
 |
| Lemon juice. |
 |
| Dill from the garden. |
1/4 teaspoon salt. Add more to taste.
Black pepper to taste.
 |
| Mustard, salt, pepper. |
 |
| Olive oil. |
 |
| Pretty layers. |
 |
| Tasty emulsion. |
At some point in here your lentils will finish cooking. Drain the lentils and put into a large bowl.
 |
| Lentils. |
 |
| Summer tomatoes for the win. |
 |
| Onion. |
 |
| Mix well. Some will pool at the bottom, but you want to make sure everything is coated. |
 |
| Delicious and nutritious! |
We ate it room temperature last night and chilled for lunch today. I loved it. So good.
And the DDH? We all know that vegetarian recipes have to garner his approval if I want to make them again for general consumption. Luckily, he likes lentils (though not raw onion, oops), and lentils are filling and chewy enough to make up for meat. He ate a big bowl and expressed his approval (except for the raw onions). Success!
Subscribe to:
Posts (Atom)