We are three weeks into this year's CSA, and so naturally, we are drowning in greens.
Spinach. Arugula. Mustard. Lettuces of every kind. Literally pounds of these greens have made their way into our fridge over the past few weeks. And though I have definitely gotten creative about adding greens into just about every meal and blanching spinach to freeze for later, with the hot weather we've been having (it's been in the nineties all week), we've been enjoying a bunch of salads, too.
Or maybe I should say, many servings of this one salad.
Because it's pretty much the only one I've been making.
But yes, it is that good.
You can sub any protein for the boiled eggs--grilled chicken or shrimp would be equally delightful, I'm sure, probably even better than the egg. But eggs don't need to be defrosted before you use them, so. You know.
A note on nuts: The DDH and I are not particularly big nut eaters. Neither of us go out of our way to put them on anything, we don't snack on them plain, and please for the love of all that is holy, keep them the heck away from our baked goods.
But the thing about CSAs is they make you try things you don't normally eat. In this case, our farmer's father has a bunch of pecan trees on his land, and so pecans regularly make their way into our CSA bags, especially early in the season when there isn't much else on offer. Except greens, obviously.
And it turns out that if you toast them in honey and butter, even a die-hard pecan-hater like the DDH will gobble them down. So while the dressing is all well and good for any salad, the pecans really make it special. And delicious.
Salad with Orange Vinaigrette and Honey-Toasted Pecans
Boil eggs, approximately 2 per person being served.
In a small bowl or convenient dressing shaker, combine:
1/4 cup orange juice
2 Tablespoons balsamic vinegar
1 Tablespoon Dijon mustard
2 teaspoons honey
1/8 teaspoon black pepper
Whisk or shake until thoroughly combined. Set aside.
In a different small bowl, put some pecans, shelled. Ours arrive cracked and blown, so I still have to pick out all the shells and I just do this until I get bored. But if you like measurements, aim for about a quarter cup.
Add enough honey to coat the pecans. It's about a 2:1 ratio, so for a 1/4 cup pecans I use about 1/8 cup (aka 2 Tablespoons) honey. But this is all sort of to taste, so feel free to use a little more or a little less.
Mix the honey and pecans until thoroughly coated.
In a small skillet, heat about 2 Tablespoons butter over medium heat.
Once the butter is melted and foamy, add the pecans. Cook until browned and toasty. There's a fine line between a browned pecan and a burnt pecan. Your best tool here is actually your nose; the pecans will just start to smell pecan-y and toasty. Stir them about; you'll notice the underside should be a little darker than the top. Give them another thirty seconds or so after your stir, then turn off the heat.
Separate your greens--spinach is especially good here, or the sort of thing called "premium greens mix" at the grocery store, but really just any sort of salad green will do--into each person's bowl. Top each serving with two sliced eggs and some pecans. Drizzle the dressing over the lot of it. Enjoy.
Showing posts with label eggs. Show all posts
Showing posts with label eggs. Show all posts
Wednesday, May 7, 2014

Tuesday, February 11, 2014
Cranberry Orange Coffee Cake
Am I the only person who goes crazy buying fresh cranberries when they're on sale at Christmas, only to have a freezer full of unused cranberries come February?
Please say I'm not.
Anyway, I had to make a coffee cake to bring to a church brunch the other day. I'm not really much of a cake person.
But I am a cranberry-orange person. And a streusel person.
I'm also a butter person; the 9x13 version of this recipe uses an entire pound of butter. Sorry, not sorry.
This is a fairly sweet coffee cake; you could probably cut the sugar in the cake by at least a half cup, since you still have the streusel. It's also very dense and heavy; surprisingly hefty and filling for a cake.
You can easily halve the recipe for an 8x8 cake if you want something a little more suitable for a family, but the 9x13 size works great if you're bringing it to a brunch, as I was.
Cranberry Orange Coffee Cake
Preheat the oven to 350 degrees Fahrenheit. Grease a 9x13 inch pan and set aside.
In a medium bowl, whisk together 2 cups flour, 3 tsp. baking powder, 2 tsp. baking soda, and 1 tsp. salt.
In a different, small bowl, combine 2 cups sugar and the zest of 2 large oranges (or 4 tangerines/clementines). Rub the sugar and zest together with your fingers until fragrant; it will clump together a little bit as the sugar moistens from the zest.
Cream 2 sticks (1 cup) butter and the sugar mixture until fluffy, about three minutes.
Add in 4 large eggs, one at a time, beating each one into the mixture before adding the next. Beat until smooth.
Beat in 2 cups plain Greek yogurt and 2 tsp. vanilla extract. Beat until well combined.
Add the dry ingredients a little at a time, mixing until just combined.
Fold in 2 cups fresh cranberries.
For the streusel:
In a separate bowl, combine 1 1/2 cups flour, 1 1/2 cups packed brown sugar, and 1 tsp. cinnamon. Whisk together.
Cut 2 sticks (1 cup) butter into small pieces. Add the butter pieces to the flour/brown sugar mixture. Cut butter into the flour with a pastry cutter or your fingertips. You're looking for an even mixture of large crumbs--you know what streusel looks like.
Pour half of the coffee cake batter into the pan and top with half of the streusel. Spoon the remaining batter over the streusel, using a spatula to spread it gently across the pan. Top with the remaining streusel.
Bake until golden brown and it passes the toothpick test, about 45 minutes to an hour.
Please say I'm not.
Anyway, I had to make a coffee cake to bring to a church brunch the other day. I'm not really much of a cake person.
But I am a cranberry-orange person. And a streusel person.
I'm also a butter person; the 9x13 version of this recipe uses an entire pound of butter. Sorry, not sorry.
This is a fairly sweet coffee cake; you could probably cut the sugar in the cake by at least a half cup, since you still have the streusel. It's also very dense and heavy; surprisingly hefty and filling for a cake.
You can easily halve the recipe for an 8x8 cake if you want something a little more suitable for a family, but the 9x13 size works great if you're bringing it to a brunch, as I was.
Cranberry Orange Coffee Cake
Preheat the oven to 350 degrees Fahrenheit. Grease a 9x13 inch pan and set aside.
In a medium bowl, whisk together 2 cups flour, 3 tsp. baking powder, 2 tsp. baking soda, and 1 tsp. salt.
In a different, small bowl, combine 2 cups sugar and the zest of 2 large oranges (or 4 tangerines/clementines). Rub the sugar and zest together with your fingers until fragrant; it will clump together a little bit as the sugar moistens from the zest.
Cream 2 sticks (1 cup) butter and the sugar mixture until fluffy, about three minutes.
Add in 4 large eggs, one at a time, beating each one into the mixture before adding the next. Beat until smooth.
Beat in 2 cups plain Greek yogurt and 2 tsp. vanilla extract. Beat until well combined.
Add the dry ingredients a little at a time, mixing until just combined.
Fold in 2 cups fresh cranberries.
For the streusel:
In a separate bowl, combine 1 1/2 cups flour, 1 1/2 cups packed brown sugar, and 1 tsp. cinnamon. Whisk together.
Cut 2 sticks (1 cup) butter into small pieces. Add the butter pieces to the flour/brown sugar mixture. Cut butter into the flour with a pastry cutter or your fingertips. You're looking for an even mixture of large crumbs--you know what streusel looks like.
Pour half of the coffee cake batter into the pan and top with half of the streusel. Spoon the remaining batter over the streusel, using a spatula to spread it gently across the pan. Top with the remaining streusel.
Bake until golden brown and it passes the toothpick test, about 45 minutes to an hour.
Friday, September 28, 2012
Vegetarian Fried Rice
I ate a lot of fried rice growing up.
My mom loves to cook, and we ate a lot of different foods when I was young. I don't think I really realized how--varied? international? something like that--our diet was until I went to college.
Still, we did have a few staple recipes in frequent rotation. A lot of them were plays on pasta--pasta with tuna fish, clam spaghetti, garlic spaghetti, even, infrequently, spaghetti with meat sauce.
Another one of those staple recipes was fried rice. And for good reason--fried rice is cheap, easy, and makes a lot of food. Mom's version included ground beef as well as a couple of eggs, so it serviced adequately as a main dish. We ate a lot of it, and with gusto.
So it's perhaps surprising that I don't think I've ever made fried rice in the history of my married career.
For one, neither the DDH nor I are big rice eaters. I am stupidly terrible at cooking rice, and after suffering through one crunchy dish too many, the DDH learned to greet rice dishes with trepidation. Rice isn't cheap if you're ruining it (and all the ingredients you add to it) all the time.
For another, though I remember scarfing down huge portions of the dish as a child, I remember fried rice as being too salty, with a slightly weird sour flavor (sorry, Mom), and generally not interesting enough to attempt to recreate.
But since the DDH has flatly refused to acknowledge the awesomeness of Tuna Fish Pasta, and with the impending arrival of someone who will eventually be a teenage boy, I've decided I need to revisit some of those cheap-and-easy childhood staples.
Then I ended up with a whole bunch of free cooked rice, and I knew that it was time to tackle fried rice. I could attempt the recipe without risking poorly-cooked rice. And since I didn't need to spend forty minutes cooking rice, I could actually get dinner on the table on a Monday evening when I had a Zumba class quickly followed by a church meeting.
I tweaked my mom's recipes in a few ways.
First, I eliminated the ground beef, not because I don't like ground beef in fried rice but because I didn't have any defrosted and didn't really have time for the extra step of cooking it anyway. Eliminating that and the accompanying beef broth turned this into a vegetarian recipe, but I'll report back with a meaty version one of these days.
Second, having eliminated the beef, I needed to punch up the protein somehow. The bites of scrambled egg are my favorite part of fried rice anyway, so it was a no-brainer to increase the egg in the recipe.
Third, I cut back on the soy sauce, since I remembered it being too salty (though cutting the beef broth probably also saved some sodium).
And finally, I added some other sauces and spices to give it a more interesting flavor. Adding sambal oolek gives it a touch of bite--not what I think of as a lot, but you do taste it. In retrospect, it's possible that Mom's fried rice was mild-flavored because we were kids. Specifically, I'm the kid who liked everything bland and hated spicy foods. So, umm, keep in mind that it's probably entirely my fault her recipe wasn't perfect to begin with. I bet when she makes it for just herself and Dad it's deliciously seasoned. Ahem.
Vegetarian Fried Rice
Adapted from my mom's recipe.
As I mentioned, I started with pre-cooked rice leftover from an office lunch. If you did not have the opportunity to rescue rice destined for the trash can, you should cook it first. Cook 1 1/2 cups rice according to package directions (to yield 3 cups rice, cooked). Set it aside and allow to cool. If you're really on top of things, you could cook the rice over the weekend and refrigerate it so it's ready to go for a fast weeknight dinner. I have never actually been this on top of things, but I pretend I am all the time.
Once you have some nicely cooked rice ready to go, proceed with the recipe:
Chop 1 medium onion and 4-5 cloves garlic so they're ready to go. I speed-demoned them in the food processor:
to:
Heat 2 Tbs. oil in a large wok or skillet (if you know me, you know this is coconut oil, but clearly you can use whatever fat you'd like).
Add the onion and garlic
and sautee until onion is translucent.
Add 12-16 oz. vegetables. The fastest and easiest is to use a bag of the small mixed veggies (peas, cube-cut carrots, and the like), but you can use any kind of frozen veggie mix or fresh vegetables. Almost any vegetable will taste good in fried rice.
Cook until soft (aka thawed, if using frozen). You can stick the lid on the skillet to speed up the process.
Meanwhile, if you promise not to get distracted, scramble six eggs. I got distracted measuring out the ingredients for the next step and semi-burned the eggs. Luckily I sort of like semi-burned eggs, and the DDH didn't seem to notice. It's best if you don't get distracted, though.
Once your eggs are off the heat and your vegetables are done,
add 3 cups cooked brown rice and a scant 1/3 cup soy sauce (between the 1/4 cup and 1/3 cup lines).
In a measuring cup, spoon out 1 tsp. fish sauce and 1 tsp. sambal oolek/chile paste/hot sauce. Fill the measuring cup with water to make 1/4 cup liquid.
Add to the rice mixture.
Stir to combine and cook until rice is heated through.
Add your scrambled egg
and mix thoroughly.
And there you have it. I was worried the DDH wouldn't find it filling enough without any meat, but six eggs seemed to add enough protein to satisfy him. Plus, brown rice tends to be pretty satisfying, fullness-wise, versus white rice. And then there's the fact that that particular combination of frozen vegetables is his favorite. At any rate, it got two thumbs up from him.
Quick, easy, cheap, tasty--it even tastes just as good the next day. Huzzah for fried rice!
My mom loves to cook, and we ate a lot of different foods when I was young. I don't think I really realized how--varied? international? something like that--our diet was until I went to college.
Still, we did have a few staple recipes in frequent rotation. A lot of them were plays on pasta--pasta with tuna fish, clam spaghetti, garlic spaghetti, even, infrequently, spaghetti with meat sauce.
Another one of those staple recipes was fried rice. And for good reason--fried rice is cheap, easy, and makes a lot of food. Mom's version included ground beef as well as a couple of eggs, so it serviced adequately as a main dish. We ate a lot of it, and with gusto.
So it's perhaps surprising that I don't think I've ever made fried rice in the history of my married career.
For one, neither the DDH nor I are big rice eaters. I am stupidly terrible at cooking rice, and after suffering through one crunchy dish too many, the DDH learned to greet rice dishes with trepidation. Rice isn't cheap if you're ruining it (and all the ingredients you add to it) all the time.
For another, though I remember scarfing down huge portions of the dish as a child, I remember fried rice as being too salty, with a slightly weird sour flavor (sorry, Mom), and generally not interesting enough to attempt to recreate.
But since the DDH has flatly refused to acknowledge the awesomeness of Tuna Fish Pasta, and with the impending arrival of someone who will eventually be a teenage boy, I've decided I need to revisit some of those cheap-and-easy childhood staples.
Then I ended up with a whole bunch of free cooked rice, and I knew that it was time to tackle fried rice. I could attempt the recipe without risking poorly-cooked rice. And since I didn't need to spend forty minutes cooking rice, I could actually get dinner on the table on a Monday evening when I had a Zumba class quickly followed by a church meeting.
I tweaked my mom's recipes in a few ways.
First, I eliminated the ground beef, not because I don't like ground beef in fried rice but because I didn't have any defrosted and didn't really have time for the extra step of cooking it anyway. Eliminating that and the accompanying beef broth turned this into a vegetarian recipe, but I'll report back with a meaty version one of these days.
Second, having eliminated the beef, I needed to punch up the protein somehow. The bites of scrambled egg are my favorite part of fried rice anyway, so it was a no-brainer to increase the egg in the recipe.
Third, I cut back on the soy sauce, since I remembered it being too salty (though cutting the beef broth probably also saved some sodium).
And finally, I added some other sauces and spices to give it a more interesting flavor. Adding sambal oolek gives it a touch of bite--not what I think of as a lot, but you do taste it. In retrospect, it's possible that Mom's fried rice was mild-flavored because we were kids. Specifically, I'm the kid who liked everything bland and hated spicy foods. So, umm, keep in mind that it's probably entirely my fault her recipe wasn't perfect to begin with. I bet when she makes it for just herself and Dad it's deliciously seasoned. Ahem.
 |
| Vegetarian Fried Rice |
Vegetarian Fried Rice
Adapted from my mom's recipe.
As I mentioned, I started with pre-cooked rice leftover from an office lunch. If you did not have the opportunity to rescue rice destined for the trash can, you should cook it first. Cook 1 1/2 cups rice according to package directions (to yield 3 cups rice, cooked). Set it aside and allow to cool. If you're really on top of things, you could cook the rice over the weekend and refrigerate it so it's ready to go for a fast weeknight dinner. I have never actually been this on top of things, but I pretend I am all the time.
 |
| Rice courtesy P.F. Chang's and my boss. |
Chop 1 medium onion and 4-5 cloves garlic so they're ready to go. I speed-demoned them in the food processor:
 |
 |
 |
to:
 |
| They never knew what hit them. |
 |
Add the onion and garlic
 |
and sautee until onion is translucent.
 |
| Transluscent onion. |
 |
| I cut the bag open with scissors and still managed to spill veggies all over the counter. |
 |
 |
 |
| Eggs. |
 |
 |
| Or more, if you like soy sauce. |
 |
 |
 |
Add your scrambled egg
 |
 |
Quick, easy, cheap, tasty--it even tastes just as good the next day. Huzzah for fried rice!
 |
| Vegetarian Fried Rice |
Thursday, August 23, 2012
French Toast
A few weeks back, I made the most amazing, delicious, scrumptious, wonderful batch of impromptu French toast out of stale Panera bagels.
I went to eat a bagel, discovered it was rock-hard, and decided that, instead of throwing it away, I would try to make French toast.
I didn't have a recipe or a plan, just some eggs and milk and stale bagels and cinnamon and it turned out perfectly.
Fast forward to Saturday. I wanted French toast. We had some bread that wasn't quite stale, per say, but you never really know, in Tulsa, if bread will go stale or moldy, and we were unlikely to eat it before it went whichever way it decided to go.
Anyway. I had this stack of bread, which the DDH obligingly dried out a bit in the toaster, and I panicked. "I can't remember what I did for the bagels. Those turned out so well. I don't want to mess up this bread. I wish I had written down the bagel-process. I need a recipe!"
The DDH rolled his eyes. "You don't need a recipe to make French toast. It's just French toast."
"That's what you say now," I said, "but you won't be so certain if I ruin it all and you have nothing to eat."
The DDH decided not to argue and went back to doing...whatever it was he was doing in the other room.
I looked up a recipe for French toast and promptly did almost nothing it said to do. Because that's how I roll.
And it turned out just fine.
This recipe is for all of you who don't really need a recipe for French toast, but want one anyway. Feel free to ignore everything it says. It's hard to go too terribly wrong with eggy bread.
French Toast
Adapted from How to Cook Everything by Mark Bittman.
This recipe makes enough batter for eight slices of commercial sandwich bread, made moderately soggy. If you use more, thicker, or drier bread (or bagels!) you may need more batter; if you prefer less-soaked toast, you may use less.
BUT. Unless you are short on eggs, you should make more batter than you think you'll need, because everyone should at least once have the experience of eating leftover batter cooked into oddly-seasoned scrambled eggs. Your tastebuds won't know what to do with themselves.
Crack four eggs into a large bowl.
Use a whisk or fork to beat up the eggs, as you would for scrambled eggs.
Add two cups of milk:
Whisk together until well combined.
Add approximately 1 tsp. vanilla and spices to taste. Cinnamon is a must-have. My personal Secret Ingredient is ginger. Other popular spices are nutmeg, cloves...any of those warm spices that belong in pumpkin pies. I don't recommend using all of those in one batch, though, unless you want pumpkin pie flavored French toast. Which, now there's an idea....
Add about 1 heaping tsp. of each to taste.
Whisk to combine.
Add in a good shake or three of salt.
There are two schools of thought on French toast preparation: the Dipping School and the Soaking School. I belong to the latter. I want toast that's as much egg as bread. I want it crunchy on the outside and moist on the inside and completely its own delicious thing.
Other people like plain toast with a little egg glaze on it. De gustibus non est disputandum, as my dad always says.
Anyway, so if you're a Dipper, you want to heat your skillet, then dip your bread to your liking into the batter and toss it on the skillet right away.
If you're a Soaker (congratulations on your good taste), pile some bread in there and leave it to soak while you heat the skillet.
The only problem with this method is that the first few slices you soak might soak up all your batter, leaving the last couple slices dry and sad. Sometimes this is acceptable or even desirable, if, say, you have some weirdos in your house who like less eggy French toast. But for best results, only soak two to three pieces at a time, and don't leave them in too long. Admonish them to leave some batter for the other toastlets. Alternatively, split the batter between two bowls so you can soak all the bread at once.
Meanwhile, heat a scant tablespoon butter or oil (a neutral flavored oil like coconut or canola, not olive oil, unless you want some really weird-tasting toast) in a large skillet.
Put the battered bread in the hot skillet.
Cook for about two minutes on each side or until browned. You'll have to keep adjusting this time as your pan gets warmer, the same way you do when making pancakes. Luckily, you can keep flipping toast back and forth until it's nicely browned on both sides without making a bit mess.
Remember that this is egg soaked bread, so you do want the egg to cook all the way through.
This is what happens if you're not firm with your bread and you let it hog all the batter: it gets really mushy and floppy.
There's nothing wrong with that, technically. They will cook fine and actually be the most delicious of all the bread pieces.
Unfortunately, it means that the rest of the bread will not have much batter to soak in:
And will be drier and less flavorful than the rest of the batch.
Which, honestly, is nothing a little honey can't remedy.
Regardless, in the end, you will have a glorious pile of eggy bread:
Serve plain or topped with butter, sugar, jam, maple syrup, and/or my favorite: honey.
I went to eat a bagel, discovered it was rock-hard, and decided that, instead of throwing it away, I would try to make French toast.
I didn't have a recipe or a plan, just some eggs and milk and stale bagels and cinnamon and it turned out perfectly.
Fast forward to Saturday. I wanted French toast. We had some bread that wasn't quite stale, per say, but you never really know, in Tulsa, if bread will go stale or moldy, and we were unlikely to eat it before it went whichever way it decided to go.
Anyway. I had this stack of bread, which the DDH obligingly dried out a bit in the toaster, and I panicked. "I can't remember what I did for the bagels. Those turned out so well. I don't want to mess up this bread. I wish I had written down the bagel-process. I need a recipe!"
The DDH rolled his eyes. "You don't need a recipe to make French toast. It's just French toast."
"That's what you say now," I said, "but you won't be so certain if I ruin it all and you have nothing to eat."
The DDH decided not to argue and went back to doing...whatever it was he was doing in the other room.
I looked up a recipe for French toast and promptly did almost nothing it said to do. Because that's how I roll.
And it turned out just fine.
This recipe is for all of you who don't really need a recipe for French toast, but want one anyway. Feel free to ignore everything it says. It's hard to go too terribly wrong with eggy bread.
French Toast
Adapted from How to Cook Everything by Mark Bittman.
This recipe makes enough batter for eight slices of commercial sandwich bread, made moderately soggy. If you use more, thicker, or drier bread (or bagels!) you may need more batter; if you prefer less-soaked toast, you may use less.
BUT. Unless you are short on eggs, you should make more batter than you think you'll need, because everyone should at least once have the experience of eating leftover batter cooked into oddly-seasoned scrambled eggs. Your tastebuds won't know what to do with themselves.
 |
| Eight slices o' bread. |
 |
| Eggs. |
Add two cups of milk:
 |
| Moojuice. |
 |
| See the yellow flecks suspended in the milk? That's what happens if you add the milk before beating up the eggs. |
Add about 1 heaping tsp. of each to taste.
 |
| The usual suspects. |

 |
| Spicy batter. |

 |

Other people like plain toast with a little egg glaze on it. De gustibus non est disputandum, as my dad always says.
Anyway, so if you're a Dipper, you want to heat your skillet, then dip your bread to your liking into the batter and toss it on the skillet right away.
If you're a Soaker (congratulations on your good taste), pile some bread in there and leave it to soak while you heat the skillet.
 |
| Soaking toast. |

Meanwhile, heat a scant tablespoon butter or oil (a neutral flavored oil like coconut or canola, not olive oil, unless you want some really weird-tasting toast) in a large skillet.
 |
| Oiled pan. |

 |

Remember that this is egg soaked bread, so you do want the egg to cook all the way through.
 |
| Nicely browned. |

 |


 |

 |

Which, honestly, is nothing a little honey can't remedy.
 |
| See how it doesn't brown evenly because there's not as much batter on the outside of the toasts. |

 |
| Eggy bread. |

 |
| French toast with Michigan cherry butter. |

Wednesday, July 11, 2012
Easy American Pad Thai
I'm a big fan of Fake Asian food.
You know what I mean. I'm sure actual people who live in China or Thailand or India or wherever don't eat anything resembling the sorts of food that I make and call Chinese or Thai or Indian or Generic Asian. I have Chinese coworkers and I know that at home they eat fish heads and chicken feet and foods much spicier than you'll ever find on my table.
But Americanized Asian food is delicious (perhaps fish heads and chicken feet are delicious too; to be fair, I've never tried them). I keep a lot of staple ingredients for these cuisines stocked because I use them frequently, and because Asian Mart (yes, that's the actual name of the store) is a strange and fascinating fish-scented wonderland full of odd ingredients, Pocky, and boba tea.
That said, perhaps not every American stocks her kitchen with fish sauce and curry paste and sambal oelek.
I have made more complicated Pad Thais (Pads Thai?) before, recipes that rely extensively on my stock of ingredients in labels that are mostly in Thai and include only limited and hilarious English captions. They are tasty, and they are not any more difficult to cook than this recipe. They just require more--and less common--ingredients.
The recipe I adapted for this Pad Thai dish, however, assumes that you have nothing more exotic than soy sauce in your pantry (well, and rice noodles). I added a touch or two of other ingredients because I had them on hand, but if you're scared off by the mention of fish sauce, follow the link to Brownies for Dinner for the original recipe, where you'll find an Americanized Pad Thai that's easy, delicious, and does not require a trip to Asian Mart.
Ironically, I did not have on hand two pretty common American ingredients: cilantro and green onions. We just got back from vacation and I don't have much of anything green on hand, and the cilantro I planted died months ago. The DDH doesn't particularly care for green onions or cilantro, so he was happy, but I love them and definitely recommend the greened version of this meal.
Easy American Pad Thai
Adapted from this recipe by Patricia at Brownies for Dinner.
Note: If you'd like to add chicken or pork to your Pad Thai, skip down, put together a batch of the sauce, and start your meat marinating before proceeding with the recipe. You don't have to marinate the meat, but it does make it tasty! Cook and set aside, then add to the noodles at the end of their cooking time.
First, you need about 8 oz. rice noodles. These come in two kinds: skinny round ones sort of like angel hair pasta, and wide flat ones. You want the wide flat ones if you have any sort of a choice.
Now, I was almost out of the wide ones, did not have time to go to Asian Mart, and the local grocery store only carried the skinny kind. So I can testify that they will work. They just get mushier, and I prefer the taste and mouthfeel of the wider noodle for a Pad Thai.
Heck, if you're desperate and/or adventurous, you could use normal white flour linguine. It'll taste different than rice noodles and have a different texture, but why the heck not, right?
Prepare your noodles according to package directions. Typically, this means soaking your noodles in hot or cold water for about thirty minutes. If your package directions are in Thai and you don't read Thai, soak them in hot hot tap water for 25 minutes. If you're using skinny noodles and it calls for a soak, then a boil, skip the boiling step. You will note the mushfest in the final pictures. This is because I did not skip the boiling step. You've been warned.
I also pulled out some fully cooked shrimp and set them to defrost. This dish is great with shrimp or chicken. If you're using raw shrimp or chicken, you will want to cook and set aside before you begin cooking the sauce and noodles, then stir in at the end when I add my already-cooked shrimp.
While the noodles soak, prep your ingredients and mix your sauce.
You will want about 1/4 cup peanuts (unless of course you're allergic to peanuts). These are to top your final dish. The DDH doesn't like them. You can buy chopped ones, or buy whole ones and chop them yourself.
Note: If you had whole shelled peanuts (i.e., still with skins), chop them with skins on. Then, blow lightly on the peanut pile. Most of the skins will float away off your cutting board, while the peanuts stay in place. Pick up your cutting board and brush all the skins into the trash or your compost bowl. Ta-da! It won't get quite all of them, but it's much easier than trying to pick out each individual skin with your fingers.
Set the chopped peanuts aside. At this time, also chop your 1/2 cup fresh cilantro, if using, and set aside as well.
In a small bowl, mix 2 Tbs. brown sugar,
juice of 1 small lime,
and 3 Tablespoons soy sauce. Or, if you happen to have some on hand, use 1 1/2 Tablespoons soy sauce and scant Tablespoon fish sauce.
Now, spice it up. A dash or two of Sriracha would be marvelous. The Roommate kept giant bottles of Sriracha on hand and I used to borrow the occasional dash for my cooking, but now that he has moved out, I obviously need to invest in my own. Chile paste would work, or even a sprinkling of chili powder or cayenne. I used 1/4 teaspoon Sambal Oelek, but this was not enough spice for us (read: neither the DDH nor I could taste it). I advise starting with a little of whatever spice you use and increasing it until it's at your comfort level.
At this point, I tossed my shrimps in the sauce to marinate a bit first and soak up the flavor.
If you're using green onions, take 3 green onions, cut off the ends, and cut the white parts away from the green parts. Then thinly slice the white parts and cut the green parts into two-inch ribbons. Set aside.
In a small bowl, beat 2 eggs.
Please note that the original recipe calls for 1 clove garlic. Here is how much garlic I used:
Anyway, peel your garlic and either mince it or have it ready for crushing through your garlic press.
Your noodles should be done about now; if not, take a break until they are. Once done soaking, drain the noodles and set aside. Remember that if your noodle directions call for boiling, you probably want to skip the boiling step.
Heat 1 Tablespoon olive oil (or sesame or peanut oil, if you'd like to be more Asian about it) in a large pan. Make sure you have all your other ingredients ready to go.
Add your minced garlic (and the white parts of the green onions, if using) to the hot pan. Cook, stirring, until fragrant, about 30 seconds.
Add your eggs and cook until just starting to set, about one minute.
Remove the eggs from heat and set aside (I set them in the now-empty bowl the noodles had soaked in).
To the pan, add your noodles, the green parts of your green onions, your sauce, and any cooked meat you're using.
Stir until the noodles are soft and everything's mixed together, about one minute. You may need to gently separate your noodles with your spatula (if possible; obviously my boiled skinny noodles became a mushy mess).
Add the eggs to the pan.
Toss and stir to break up the eggs and mix everything together.
Ta-da! All done. Serve with a lime wedge and topped with the chopped peanuts and maybe some fresh cilantro.
Okay, so the directions are really long with all those pictures, but I promise it's a very, very simple recipe. Mostly you're just soaking, mixing, and quickly cooking! It's hard to go too wrong here.
You know what I mean. I'm sure actual people who live in China or Thailand or India or wherever don't eat anything resembling the sorts of food that I make and call Chinese or Thai or Indian or Generic Asian. I have Chinese coworkers and I know that at home they eat fish heads and chicken feet and foods much spicier than you'll ever find on my table.
But Americanized Asian food is delicious (perhaps fish heads and chicken feet are delicious too; to be fair, I've never tried them). I keep a lot of staple ingredients for these cuisines stocked because I use them frequently, and because Asian Mart (yes, that's the actual name of the store) is a strange and fascinating fish-scented wonderland full of odd ingredients, Pocky, and boba tea.
That said, perhaps not every American stocks her kitchen with fish sauce and curry paste and sambal oelek.
I have made more complicated Pad Thais (Pads Thai?) before, recipes that rely extensively on my stock of ingredients in labels that are mostly in Thai and include only limited and hilarious English captions. They are tasty, and they are not any more difficult to cook than this recipe. They just require more--and less common--ingredients.
The recipe I adapted for this Pad Thai dish, however, assumes that you have nothing more exotic than soy sauce in your pantry (well, and rice noodles). I added a touch or two of other ingredients because I had them on hand, but if you're scared off by the mention of fish sauce, follow the link to Brownies for Dinner for the original recipe, where you'll find an Americanized Pad Thai that's easy, delicious, and does not require a trip to Asian Mart.
Ironically, I did not have on hand two pretty common American ingredients: cilantro and green onions. We just got back from vacation and I don't have much of anything green on hand, and the cilantro I planted died months ago. The DDH doesn't particularly care for green onions or cilantro, so he was happy, but I love them and definitely recommend the greened version of this meal.
 |
| Easy American Pad Thai. |
Easy American Pad Thai
Adapted from this recipe by Patricia at Brownies for Dinner.
Note: If you'd like to add chicken or pork to your Pad Thai, skip down, put together a batch of the sauce, and start your meat marinating before proceeding with the recipe. You don't have to marinate the meat, but it does make it tasty! Cook and set aside, then add to the noodles at the end of their cooking time.
First, you need about 8 oz. rice noodles. These come in two kinds: skinny round ones sort of like angel hair pasta, and wide flat ones. You want the wide flat ones if you have any sort of a choice.
 |
| Skinny on the left; wide on the right. |
Heck, if you're desperate and/or adventurous, you could use normal white flour linguine. It'll taste different than rice noodles and have a different texture, but why the heck not, right?
Prepare your noodles according to package directions. Typically, this means soaking your noodles in hot or cold water for about thirty minutes. If your package directions are in Thai and you don't read Thai, soak them in hot hot tap water for 25 minutes. If you're using skinny noodles and it calls for a soak, then a boil, skip the boiling step. You will note the mushfest in the final pictures. This is because I did not skip the boiling step. You've been warned.
 |
| White on white on white. Great picture, huh? |
 |
| Scramps. |
You will want about 1/4 cup peanuts (unless of course you're allergic to peanuts). These are to top your final dish. The DDH doesn't like them. You can buy chopped ones, or buy whole ones and chop them yourself.
 |
| Chopped peanuts. |
Set the chopped peanuts aside. At this time, also chop your 1/2 cup fresh cilantro, if using, and set aside as well.
In a small bowl, mix 2 Tbs. brown sugar,
 |
 |
| About 2 Tablespoons juice. |
 |
| Sauce de Poisson. I promise that doesn't mean "poison." |
 |
 |
| The seeds are the spicy bits. |
 |
| Not sure what the rooster has to do with anything. |
 |
| Nom nom nom. |
In a small bowl, beat 2 eggs.
 |
| No need to break out the beater; a fork will do fine. |
 |
| Again with the white on white, sorry. |
and I still didn't really taste a particularly garlic flavor. Keep this in mind whenever I give recipes using garlic around here....
Anyway, peel your garlic and either mince it or have it ready for crushing through your garlic press.
Your noodles should be done about now; if not, take a break until they are. Once done soaking, drain the noodles and set aside. Remember that if your noodle directions call for boiling, you probably want to skip the boiling step.
 |
 |
 |
| See how it's starting to brown? Add the eggs just before you get to that point. Photographing the process leads too often to burnt garlic. |
 |
| You could cook yours less than this, but I needed to make sure they were hard cooked, since I'm pregnant. |
To the pan, add your noodles, the green parts of your green onions, your sauce, and any cooked meat you're using.
 |
| The sauce and the shrimp all came in together. |
 |
| Shrimp mush. |
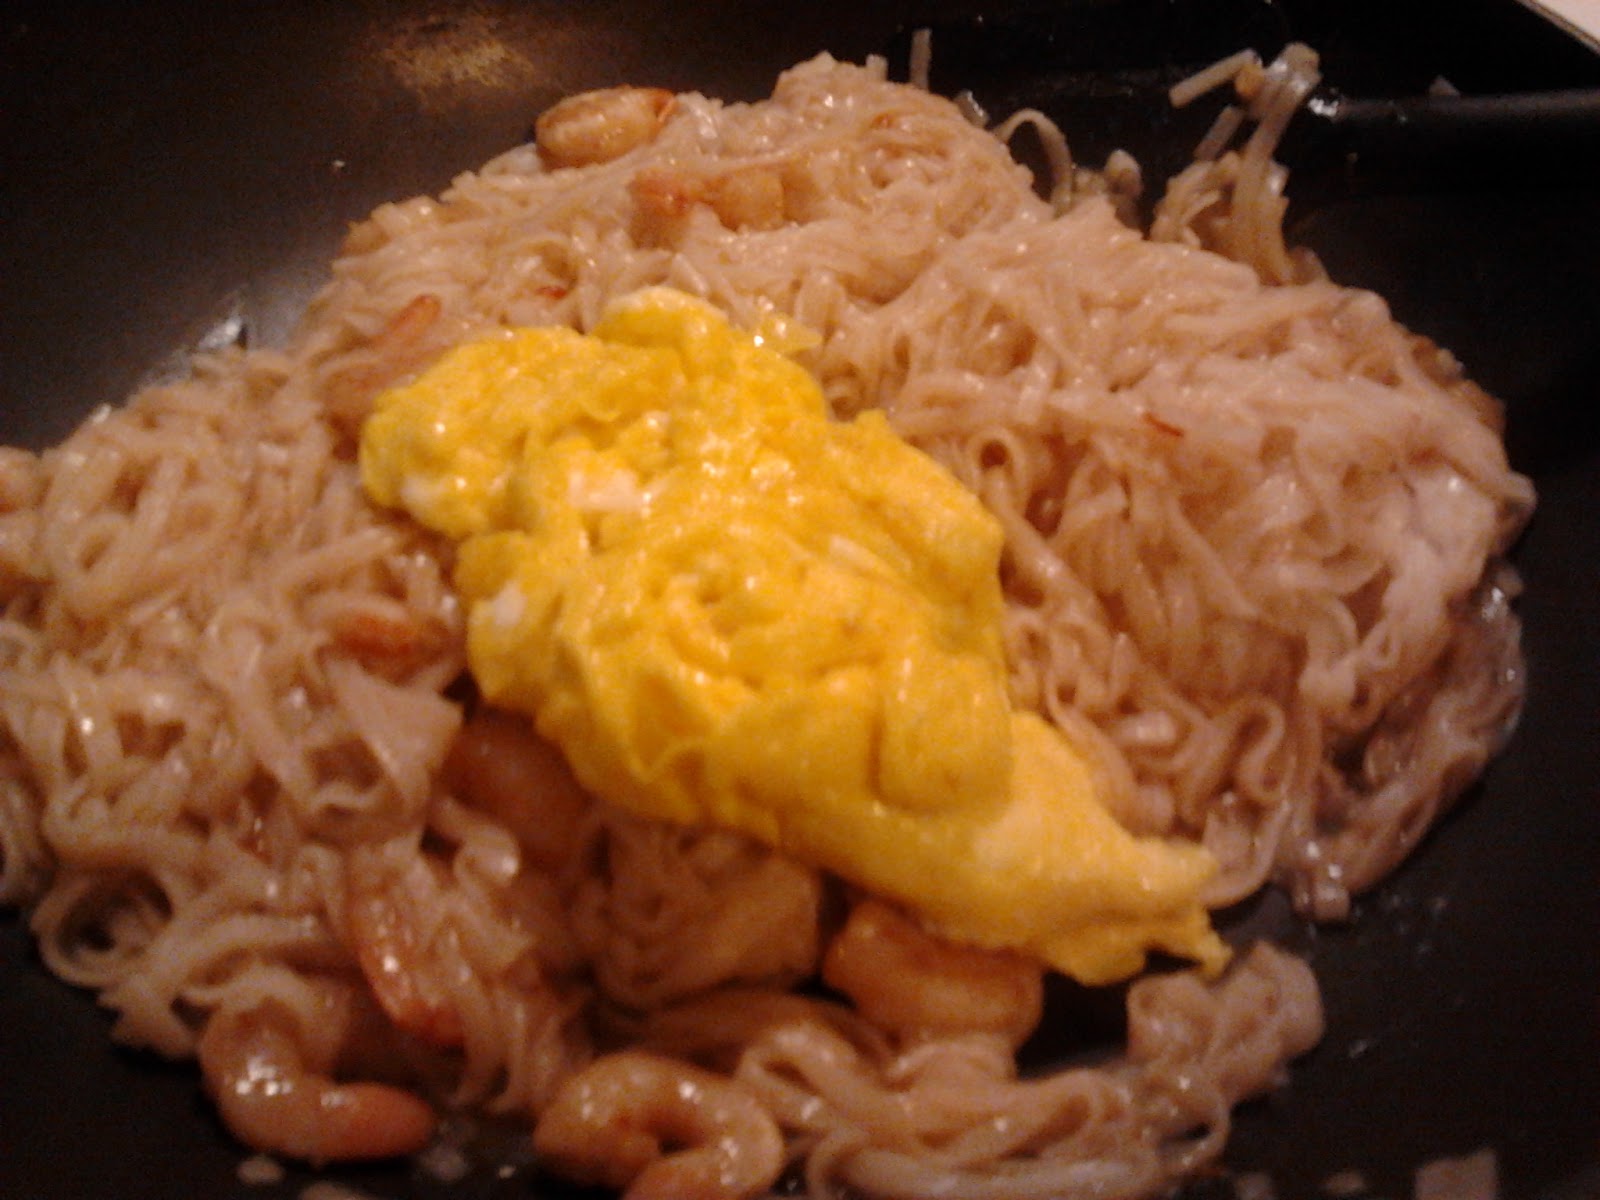 |
 |
 |
| The End. |
Enjoy!
Subscribe to:
Posts (Atom)