Tuesday, February 28, 2012

Chocolate Chip Red Velvet Cookies with Cream Cheese Frosting

The DDH's favorite cake is red velvet with cream cheese frosting.

I mean, it's really just chocolate, but somehow the red makes it taste special, y'know?

I'm not a particular fan of cake, but then the Roommate brought home some red velvet with cream cheese frosting cookies from the store.

They were those big fluffy Lofthouse-style cookies with a thick layer of cream cheese-flavored icing. And they were not bad.

But I knew I could make them better.

So I trolled the internet and found this recipe first. They looked pretty delicious, but no way was I going to buy a cake mix in order to make homemade cookies. That's dumb, y'all. The cream cheese frosting, though, seemed like a win. It at least gave me a method and ingredients.

Poking about further on Google led me to this recipe for really homemade red velvet cookies. Chocolate chip red velvet cookies, even. I was encouraged that she described them as chewy and cookie-y versus cakey, the way both the Lofthouse cookies and, I'm sure, the cake-mix version were. But she didn't include any cream cheese frosting, which seemed like a fatal oversight.

So I combined them.

It was supposed to be for Valentine's Day for the DDH, but I ended up with a migraine that Monday night and didn't get them made. So instead they were a welcome home present.

And a successful one. ^_^

One recipe, three styles.
Chocolate Chip Red Velvet Cookies with Cream Cheese Frosting

Note: Your cream cheese should be room temperature when you make the frosting, so get that out ahead of time.

This recipe has you make the frosting ahead of time, freeze it for at least two hours, and then use it as a filling for the cookies. That would probably be the most delicious thing ever. I didn't have time to do that, so I made it while the first batch of cookies was cooking and ended up using it three ways:
  1. Spread thickly on cooled cookies, like you would ice a cake.
  2. Spread onto hot-out-of-the-oven cookies, so it melted and became more glaze-like.
  3. Pressed an indentation into not-yet-baked cookies, filled indentation with icing, put a little extra dough on top, and baked thusly. This was the closest to the filled cookie version, obviously, and my favorite.
So depending on your time constraints and cookie/icing preferences, you may want to make the icing in advance, before/while you're mixing up the cookies, or while they're baking for use afterward.

For the Cookies:

Preheat oven to 375 degrees.

In a large bowl, beat together 1/2 cup (one stick) butter, 1/2 cup white sugar, and 1/2 cup brown sugar until fluffy.
From this...

...to this. Or that's how I interpret "fluffy," anyway.
Add 1 egg and 1 tsp. vanilla and beat until smooth.

From this...

...to this.
Don't let the spatula in the pictures fool you; I'm using an electric hand beater here. And you will need to kick up to medium or high speed in both the previous steps.

Beat in 1 tsp. red food coloring. If you look at the original recipe, you will notice that her cookies turned out bright red, even after being baked. Mine didn't. They were more of a red-tinged chocolate color. So if you want bright red cookies, you may want to add more food coloring, or maybe try adding some after you add the cocoa if they're not still red enough. Because obviously they were really red at this point.

Blood cookies.

It's hard to tell in the picture, but it was bright! red! at this point.
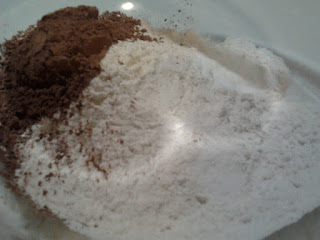
In a separate bowl, combine 1 1/2 cups flour, 1/3 cup cocoa powder, 1 tsp. baking soda, and 1/4 tsp. salt.

From this...

...to this.
Stir flour mixture into butter/egg mixture until just combined.

This dough is really thick and stiff, and I think I had to use a beater.
Fold in 1/2 cup chocolate chips. Toss in a few extra for good measure.

From this...

...to this. And you can't use a beater or you'll break up the chips.
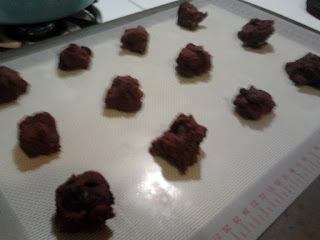
Scoop balls of dough onto a cookie sheet. I tried several sizes, and all came out tasty after ten minutes, though the smaller ones are a little harder.

Small.
Medium.
As mentioned in the note, I took some of the cookies (these were the largest), and made thumbprint indentions in the middle,

It's hard to tell.
filled the indention with icing,

Yum.
and stole some dough from the edges of the cookie to press on top of the icing.

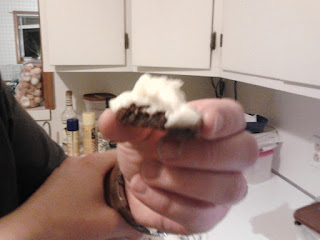
A semi-filled cookie.
Bake 10-12 minutes (ten turned out perfectly in my oven). Let sit on the pan for a minute (now would be when to spread the icing on if you want it glaze-y),

Small glaze-y cookies. Not really as thin as a glaze, but melty.
then transfer to a wire rack to cool (after which you can ice them for a cake/Lofthouse cookie effect).

Medium Lofthouse-style cookies.
And here's how the big ones turned out:

On the tray.

The icing browned slightly at the tips.
For the Frosting:

Beat 8 oz. (one brick) more-or-less room temperature cream cheese with 2 cups powdered sugar and 1 tsp. vanilla.

There's cream cheese under there somewhere.
Taste and beat in more sugar or vanilla to taste.

Just right.
I liked mine less sweet (2 1/2 cups sugar : 8 oz. cream cheese); the original recipe called for 2 cups sugar : 4 oz. cream cheese, but I think 4 cups for 8 oz would have been too sweet.

This frosting is amazing. I was eating it right out of the bowl (it also makes way more than you really need for the cookies and you would be fine halving it, I suspect). It's tangy and creamy like the cream cheese and not too sweet, with that back-of-the-tongue vanilla taste...nom nom nom. So much better than cream-cheese-flavored store-bought frosting. SO MUCH BETTER.

Conclusion

I ate so much dough and icing that I'm not sure I ever even tried a finished cookie--but the dough and incing were good! ^_~

The DDH loved them, especially the icing. He kept adding more to the already-thickly-frosted cookies.

"That's the right amount of icing."
They are not super-bright red, but they're still reddish. And you can't really argue with a double-chocolate cookie with homemade cream cheese icing, no matter what color they are. :-)

These cookies are definitely best warm--though what cookie isn't? I'll have to fiddle with the recipe to see if I can make them fudgier and chewier, as they end up being just a touch dry (though maybe that's a good thing against the frosting?).

Also, remember that you'll want to refrigerate them if they're going to hang around more than a day or so!

Monday, February 27, 2012

Reality Dinner, Day 8

The DDH returned from Houston tonight.

I tried to go buy some mussels that were on sale to make a delicious, special welcome-home dinner.

The grocery store, of course, was out of those mussels. So I decided to try this microwave mussel dinner, because I had my heart set on mussels.

Blech. It was gross. Way too salty, and sort of fishy, and generally not nearly as tasty as they looked.

Looked good, smelled good, tasted gross.
I was keenly disappointed, but I guess that's what I get for purchasing prepared frozen food. It's more expensive and never really that good.

The saving grace of the meal: warm crusty bread dipped in herby lemony olive oil.

Olive oil, herbes de provence, and lemon juice to taste.
I could eat that and only that all day long....

Sunday, February 26, 2012

Reality Dinners, Days 5-7

The DDH was out of town all weekend, and I fell victim to the perils of It's Not Worth It To Eat Alone.

So Friday, I went out with a friend and had a delicious parmesan chicken wrap at The Brook (should have photographed it but didn't, oh well).

Saturday, I ate leftover homemade pizza (again, no photo. I'm terrible at this game).

Sunday I did make delicious jalapeno goat cheese eggs for lunch:

Milk, eggs, jalapeno goat cheese.

In a bowl.

Whisk together.

Cook in a buttered pan.

Slowly on low heat.

Until they're fluffy and cheesy and amazing.

Eat outside even though it's February because it was 70 degrees.
But for dinner I just had a granola bar.

Oh well. Back to our regular schedule Monday.

Saturday, February 25, 2012

Chicken Cacciatore

Sort of. Cacciatore is traditionally braised meat (chicken or rabbit) and involves wine, and this is neither braised (because it's not covered while in the oven) nor is there wine in it. Why is there no wine in it? This was a serious oversight on my part.

Ugh, when I googled cacciatore to find its Wikipedia article, I discovered that The Pioneer Woman has posted a recipe for chicken cacciatore. It involves not only wine but also butter! Why do I even bother? You should probably desert this page and go use her recipe.

Unless, of course, you are a classy and refined human being and do not like bell peppers. Because, for some reason, all recipes for cacciatore involve bell peppers.

Gross.

Disgusting.

Why would anyone ever want to ruin perfectly good food with bell peppers, of all revolting things? Blech.

Dear friends, I am here to assure you: you can make a sublime chicken cacciatore sans bell peppers. Without even a trace of those nasty little creatures that are worshiped by tastebudless rubes everywhere.

Not that I feel strongly about the issue or anything.

Actually, mostly I'm still upset that I missed an opportunity to put wine in a dish. Tragic, really.

On to the recipe.

 Chicken Cacciatore ala Katie

Preheat oven to 350 degrees.

Heat oil in a large skillet.

In case you forgot what that looks like.
Sprinkle 2 chicken leg quarters or 4 thighs or really whatever bit of the chicken you like to eat with a bit of salt and pepper. (N.B.:  This makes a sort of half-batch of chicken cacciatore, enough for two people plus a bit of leftovers. Feel free to double everything.) Rub the salt and pepper into the skin.

Cook chicken on medium high heat for four minutes on each side until browned.

Ideally a little browner than that.

Remove chicken and keep warm. I advise you to set it in the dish you're about to bake it in, kept on top of the preheating oven. That's warm enough.

Appropriately brown.

Dump 1 cup chopped onion, about three stalks chopped celery, 1 tsp. marjoram (or rosemary, if you prefer--traditional, but the DDH hates it), 4 cloves garlic, minced, and some salt into skillet. Cook for three minutes or until beginning to soften, stirring frequently.

Wouldn't hurt to add more celery.

Add 8 oz. sliced mushrooms and cook for 6 minutes, stirring occasionally.

Mushrooms.
Fresh mushrooms are of course the most delicious, but fresh mushrooms and I, we're not friends. For the life of me I can't manage to use them before they go bad. I can buy them for a specific recipe I plan to cook that very day and the things will still slime-rot on me (usually because I end up not cooking it that night and that night turns into tomorrow turns into three weeks later...but still). The DDH and I both love mushrooms, however, so I always keep a can or ten on hand. Not as good as fresh, but cheap and tasty nonetheless.

Add 1 1/3 cups tomato sauce (aka one can). The recipe I was adapting recommends jarred marinara sauce of all things, but loves, I simply don't believe in jarred marinara sauce when you can get cans of plain tomato sauce and have a fully-stocked spice cabinet. Here's my marinara sauce:

Spices in sauce.
A bunch of spices dumped on top of the can of tomato sauce. Nom nom nom. As I recall, there's basil, oregano, marjoram, fennel (trust me on the fennel, it totally adds das gewisse Etwas to the sauce), black pepper...parsley, maybe? Anyway. For this dish, you're cooking the sauce anyway, so the flavors will meld and permeate the sauce deliciously while it cooks, so there really is no reason to buy a pre-made marinara sauce. Dumb.

Anyway, where were we? Yes. So add that in and cook for a minute, stirring to make sure everything gets mixed together well.

Looking good.
Scrape your proto-sauce out into a glass baking dish. The one that's smaller than the 9 x 13 pan that comes in the set with it and you never use it because all the recipes are for the big pan...that one. Unless, of course, you've doubled the recipe to feed more people, in which case use the 9x13 one. Obviously.

The smaller pan.

Nestle your browned chicken on top of the vegetable mixture.
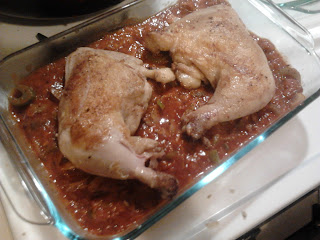
Cozy.
 Bake at 350 for twenty to thirty minutes or until chicken is done.

Doesn't really look that different.

Cut into the fat part of the drumstick to check or you will spend the entirety of dinner puzzling over bits of chicken going, "Does that look cooked to you? I don't know if it's cooked all the way. It's pretty red. But I mean the texture is right. I'm sure it's fine. Yes it's fine. Though I don't know...it's sort of pink right there. Is it cooked all the way?" because you skimped on cooking time and cut into what apparently was a thinner part of the chicken than you thought. On the other hand, maybe someone will finally buy you that new meat thermometer for your birthday or maybe even sooner not that that's a hint or anything.

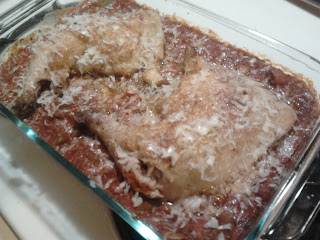
Sprinkle with pecorino romano or parmesan cheese

Do not neglect this step.
Other than the quoted worrisome chicken conversation, this dinner received A+++s all around. Somehow the time in the oven takes all those disparate vegetables and spices and turns them into magic.

I wish I had made five times as much of the sauce and canned it so I could keep that flavor forever, because here is the problem with making up cooking as you go along: it never turns out the same way twice. Shocking revelation, I know.

But I have people profess profound admiration for me because I can just toss ingredients together, experiment and fudge around with them without measuring every pinch. This is in fact a nifty skill, namely because it cuts down on the number of measuring spoons I have to wash, but the downside is that nothing. ever. turns. out. the same way. twice. EVER. Perhaps the madskillz of not measuring AND replicating recipes will come with age (my mother seems to be good at this, though she is only thirty). In the meantime, here we are.

Tastes much, much better than it looks.
 I've already eaten all the leftovers and I am so sad....

Thursday, February 23, 2012

Reality Dinners, Day 3

Wednesday nights I have Bible study/fitness class from 5:30 to 7 p.m. Then I usually have choir and praise team practice from 7 to 9 p.m.

Yesterday, of course, was Ash Wednesday, so for the next several weeks I'll have church at seven, followed by choir practice (praise team moves to Tuesdays for Lent) (because you wanted to know my schedule in such intimate detail).

It would be a terrible idea to eat a full dinner right before an hour of torture exercise, and I get home so late that I don't make dinner then, either. So usually I have a snack before Bible study and another when I get home. The C-Fit leader also usually has little samples of healthy foods and recipes, so those help tide me over.

I'll give you pictures for Wednesday, but now you know why they won't usually be of an actual dinner.

I had a couple of forkfuls of leftover chipotle sweet potato mac'n'cheese, and:

Microwave popcorn.
How's that for a healthy meal?

Wednesday, February 22, 2012

Latkes

Mardi Gras calls for fat foods, sweet foods, meaty foods--all the decadent deliciousness that you're supposed to give up for Lent.

In my mind, I had planned an epic breakfast-for-dinner feast of pancakes (maybe), sausage, bacon, and the star of the show, latkes.

In practice, the DDH had to work late and didn't come home before his Youth Board meeting, and I had Zumba and, well, I made the latkes....

Latkes, Kartoffelpuffer, potato pancakes...whatever you call them, they're delicious.

I was introduced to these culinary wonders by my third grade teacher, who was (is? she's probably not dead yet) Jewish. Oil-fried latkes are a traditional food at Hanukkah. I pretty much thought they were the most amazing food ever created by man, and after this my mother would periodically indulge us and make them at home. We usually ate them topped with sour cream.

In Tulsa, Kartoffelpuffer are the highlight of any event sponsored by the German-American Society, where they are served topped with applesauce.

Latkes are divine topped with either sour cream or applesauce, but a little bland plain. Keep this in mind.

They are crispy-fried on the outside and moist on the inside. You will not be able to eat just one.

Latkes

Baking potatoes (russets) work best for these because of their starch content (at least, that's what Joy of Cooking says). But you might as well try them with whatever potatoes you have on hand, because did I mention how delicious they are?

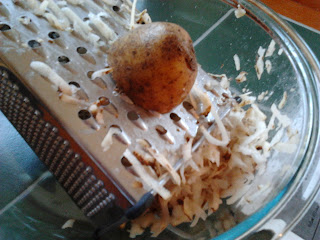
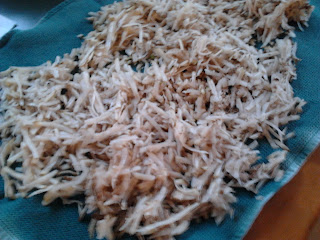
Coarsely grate some potatoes. I did a large-mediumish one and two small-mediumish ones and that made four cups of grated potato.

A cheese grater works just fine on potatoes, too.
Dump your bowl o' grated potato onto a clean dish towel.

Preferably a towel that's not very fuzzy.
Fold the dish towel over the potatoes and press to absorb the moisture.

Like so.
I then scooped handfuls into another dish towel and tried to wring out more moisture before returning them to the bowl. You want to remove as much as possible, but you won't be able to remove it all, so don't worry too much.

For four cups of grated potato, I added three jumbo eggs, beaten. We bought them from a different farmer last week and they are huge freaking eggs. If yours are more normal sized, you may wish to try four, or six. More eggs will make a creamier, eggy cake while fewer make them more like hash browns.

Do as I say, not as I do, and beat the eggs first.
I then added about 2 Tbs. flour, 2 tsp. salt (you could definitely get away with less), and 2 heaping Tbs. chopped onions.

You could get away with less salt.
You will notice I neglected to beat the eggs before adding them to the potatoes, so I broke up the yokes with a fork here.

It worked out.
Mix together thoroughly.

Try and coat all the potato in egg/flour mixture.
In a large skillet, heat about 1/4 inch vegetable or peanut oil.

Canola oil works well.
It will take five or ten minutes to heat up. One way to test that it's hot enough is to stick a wooden chopstick in the pan. A stream of bubbles should rise from the chopstick.

Place a heaping scoop of potato mixture in the hot oil.

You should be able to fit three or four in your pan at a time,
depending on the size of the pan and the size of the latkes.
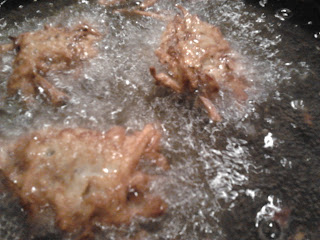
Depending on how hot your oil is, you may let them fry for a minute or so before flipping them, or you may have to make a mad dash for the tongs to flip them almost immediately. You'll be able to tell.

Other side.
Fry on the other side until both sides are a tasty golden brown.

Remove from the oil and place on a plate lined with paper towels. Repeat.

The first batch got a bit crispy 'round the edges.
As the potato mixture sits, you'll notice liquid pooling in the bowl. This is just the water being drawn out of the potatoes. Don't worry about it; you'll just have to sort of spill it off the sides of your spoon, since ideally you don't want to pour water into hot oil (Never Pour Water On A Grease Fire, does anyone else remember those PSAs?).

Like so.
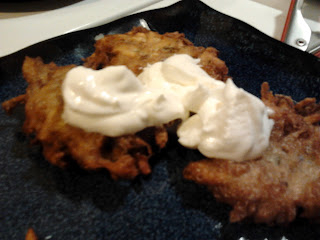
Top with sour cream, applesauce, cottage cheese, yogurt cheese, cinnamon sugar, jam, etc. and devour.

Sour cream on top.
As I said, they're a bit bland (and salty) without any sort of topping, but a creamy or sweet topping cuts the hearty saltiness of the oily potatoes and makes everything amazing forever.

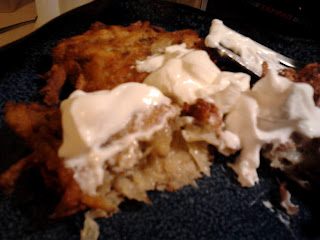
Crispy on the outside, moist on the inside.
I did not make enough of these....

I made more than this. Still not enough.
I just noticed I didn't have a potato tag yet. HOW DID I NOT HAVE A POTATO TAG?

Categories

almonds (2) apples (1) Asian (2) asparagus (2) avocados (1) bacon (8) baked (11) beans (3) beef (9) berries (4) bok choy (1) bread (7) breakfast (11) broccoli (3) budget (43) butternut squash (3) cabbage (2) cake (1) caramel (2) carrot (10) cheap (46) cheating (11) cheese (12) chicken (11) Chinese food (3) chipotle (1) chocolate (6) cookies (1) cooking rules (18) corn (4) cranberries (1) cream (3) cream cheese (2) crockpot (2) cucumber (1) dairy free (4) dessert (10) dipping sauces (3) dried beans (2) eggs (11) experiments (2) fast (40) fish (1) from scratch (41) garden (15) garlic (22) gluten free (5) grain free (3) green beans (2) greens (5) grilling (4) grocery shopping (8) healthy (32) homegrown (7) honey (8) Indian food (2) jalepeno (6) lemon (8) lentils (1) lettuce (3) lime (3) make ahead (6) Mexican (5) milk (3) oats (2) onion (12) orange (4) paella (1) pasta (11) pasta sauces (10) peanuts (1) pecans (1) pork (4) potato (6) pumpkin (2) quick sides (7) quick version (7) reality bites (14) rice (6) rice noodles (1) roasted (1) sage (1) salad (5) sausage (4) shrimp (4) simple (54) snacks (6) soup (5) sourdough (1) spinach (1) spring (4) sriracha (2) summer (11) summer squash (7) sweet potatoes (6) teriyaki (1) the DDH cooks (13) tomatoes (16) tortillas (5) vegetarian (24) winter (11) winter squash (2) zucchini (7)