Thursday, August 9, 2012

Just Tomatoes Sauce for Freezing

I've been remiss in posting, but not in cooking! I've been up to all kinds of shenanigans in the kitchen, including impromptu bagel French toast Sunday that I should have documented for posterity, but didn't.

So good.

Anyway. For those of you who haven't noticed, it's August (already!). What does August mean? Tomatoes! Technically the tail-end of the tomato season, especially considering the crazy heat we've been having in Oklahoma. But that just means there are lots and lots of delicious, juicy, but maybe not completely perfect tomatoes available at the Farmer's Market (and perhaps in a backyard near you)!

I love tomatoes. I tend to buy pounds and pounds of them this time of year--pounds and pounds that I can't possibly eat before they dissolve into icky tomato mush.

So I turn them into a basic tomato sauce for freezing. Fast, simple, no messing around with canning and acidity levels and botulism. I have plenty of room in my freezer for a few flat baggies of sauce. Because the sauce is unseasoned, it can be used in all kinds of recipes later--to add a tomatoey punch to taco meat, summer flavor to tomato soup, or, of course, as the base for all kinds of pasta sauces.

If canning intimidates you but you want to store up some of that summer-fresh produce for winter, do this. Trust me.

Just Tomatoes Sauce for Freezing
Adapted from this recipe at The Girl's Guide to Guns and Butter.
And by adapted, I actually mean that mine's just a smaller batch, I think.

Start with some tomatoes. It doesn't really matter how many you have; this will work fine with two pounds or ten, so long as you have an appropriately-sized pot.

Core the tomatoes and chop them into pieces. Large bite-sized pieces are about right; this might be quarters or eighths or halves, depending on how big your tomatoes are. Feel free to toss grape tomatoes in whole.

De-seed the tomatoes if you want, though I like them left in. Don't worry about the peels, as those will be shredded when you blend them anyway.

Chopped tomatoes.
Put the tomatoes in a pot.
Potted tomatoes.
Sprinkle them with salt to taste (I tend to undersalt here since I use this sauce in such a variety of end dishes).

Add just a splash or two of water. You want enough to help the cooking get started, not dilute the flavor.
Not much water at all.
Bring to a simmer and cook, uncovered, 10 to 35 minutes. Yes, that's a wide time range, but remember I gave you a wide poundage range! Two pounds of tomatoes don't take long; ten pounds will take longer. The key is to get your tomatoes to look like this (feel free to beat them up with a potato masher if you'd like):
About halfway done.
And finally this:
Done.

The tomatoes should break down and get juicy (I told you you didn't need to add much water), but shouldn't cook down or get thick.


Cooked tomatoes.
Then it's time to blend! You have two options, depending on your available equipment: immersion blender or regular blender. Or, I guess, food processor.

To use a regular blender or food processor, pour your cooked and somewhat cooled tomatoes into said appliance and blend until smooth.

If you have an immersion blender (and you should, if you like sauces and soups and all other kinds of things), you can blend right in the pot. Or you can pour the cooked tomatoes into a bowl that's better shaped for pouring; this will make it easier to pour your sauce into plastic bags for freezing.
Blending.

Blended.
The sauce should be nice and smooth once blended.

Once the sauce is fully cooled, you're ready to bag and freeze it. You'll need freezer bags, not just storage bags. These use a thicker plastic and a better seal to keep everything fresh and tasty in the freezer.

You could always use plastic or glass containers with lids, too, of course, making sure to leave plenty of headroom for when the liquid expands as it freezes. I like plastic bags because they freeze flat and airtight, making them easy to store and keeping the sauce from getting freezer-burn.

Label your bag with the contents, amount, and date (so, not anything like the one in the picture).
You will want to label your bag better than this.
My first small batch I used some of it fresh and had enough for about 1 1/2 cups of sauce for freezing. A second, larger batch yielded four two-cup bags o' sauce. I usually use about two cups of sauce in most recipes; if you have a different frequently used recipe size, feel free to adjust accordingly.

Just measure:
Cup o' sauce.
And pour into the plastic bag:

Like so.
The original recipe has a nifty trick if you're doing several of these: prop your bags up inside a large pot so they'll all stay upright, making it easier to pour the sauce into the bags. Because this can get messy.

Seal the bag, pressing to remove as much air as possible. Then shimmy it around so it lies flat, like so:
Flat for storage.
You can stack bags on a cookie sheet to help them freeze flat, then line them up once they're frozen. The flat rectangle shape saves room in the freezer and thaws more quickly than a big pooled chunk.

And that's it! You now have summer-fresh tomato sauce for all your winter cooking needs.

Tuesday, July 17, 2012

Lemony Lentil Salad

I love lentils.

Maybe that's a weird thing to say about this little legume. But it's true. I like the taste and the funny texture.

It's rare to find a food that's cheap, filling, healthy, and tasty, but lentils are all of those.

Dried lentils, like dried beans, are incredibly inexpensive, but they don't require soaking or long cooking times the way their bigger cousins do. So while I have a balance of cheap dried beans and more expensive, convenient canned beans in my pantry, with lentils I just buy dried.

I confess I've been in a bit of a rut cooking lentils, however. I add them to soups and stews to thicken them up, make them more filling and meaty without actually adding more meat. But I rarely do anything else with them.

At five o'clock yesterday afternoon, I had no meat defrosted, the thermometer read100 degrees, and a hungry DDH who needed leftovers for lunch the next day.

A quick perusal of the internets yielded an idea or two, which led to this: a summery cool vegetarian meal that even the DDH enjoyed.

Lemony Lentil Salad.
I told you I love lentils.

Lemony Lentil Salad

Lentils roughly double in volume when cooked. I wanted about three cups cooked lentils, so I measured out 1 1/2 cups dried lentils. This would be an easy recipe to double (or halve) to serve to a crowd (or just yourself).

Lentils.
Put your lentils in a strainer and rinse with hot water. Paw through them and check for little stones or other debris. Alternatively, put the lentils in a bowl, cover with hot water, and drain. The latter method will get them cleaner; the former is quicker and uses fewer dishes.

Rinsing--check for stones and grit.
Put the lentils in an appropriately sized pot and add twice as much water as you did lentils. So for 1 1/2 cups lentils, add 3 cups water. Warm or hot water is better.

You should have way more water than in this picture. I
just barely covered the lentils and had to add more water
almost immediately.
Bring to a boil, then turn the heat down and simmer until done. The lentils will dramatically increase in volume, so add more water if you need to. It will take 15-45 minutes for your lentils to cook, depending on how old and dry they are, how high you keep the heat, etc.

See how much the lentils have risen?
While the lentils are cooking, mix up your dressing.

In a small bowl or a handy shaker thing like I have, add 1/3 cup lemon juice (a bit more than one lemon, unless your lemon is pretty big and juicy). (Tip: Squeeze two (or more) lemons, measure out the juice you need, and pour the rest into an ice cube tray. Freeze and pop out into a labeled bag; pull out whenever you need fresh lemon juice. The lemon juice I'm using is actually frozen leftover lemon juice rather than true fresh juice.)

Lemon juice.
Several sprigs fresh dill or 1+ teaspoon dried dill. Just add some, taste, and add more if necessary.

Dill from the garden.
2 teaspoons Dijon mustard. Or brown mustard of your choice. Or yellow mustard, if you must. Or even some mustard seed or dried mustard, if you're out of the usual condiment.

1/4 teaspoon salt. Add more to taste.

Black pepper to taste.

Mustard, salt, pepper.
1/3 cup extra virgin olive oil. (Read instructions below for how to add it to your dressing mixture!)

Olive oil.
Now. If you're using a dressing shaker, you can just layer everything in there and shake vigorously for thirty seconds. If you're using a bowl, you'll want to s l o w l y add the olive oil while constantly whisking the mixture with a fork or whisk. You want your oil and acid to emulsify and turn creamy, not separate into lemon juice with a grease slick.

Pretty layers.

Tasty emulsion.
Chop any vegetables you'd like to add to your salad: tomatoes, cucumbers, onions, summer squash, blanched green beans, steamed broccoli...whatever you have lying around that you think would be tasty.

At some point in here your lentils will finish cooking. Drain the lentils and put into a large bowl.

Lentils.
Add your vegetables. I had a nice juicy red tomato

Summer tomatoes for the win.
and a white onion.

Onion.
Pour on your dressing and stir to combine.

Mix well. Some will pool at the bottom, but you want
to make sure everything is coated.
Serve your lentil salad on top of lettuce, rice, or pasta--or all by itself! This would also make a nice accompaniment to a salmon filet or some other fish.

Delicious and nutritious!
It occurs to me that some parmesan cheese grated on top of that would be divine.

We ate it room temperature last night and chilled for lunch today. I loved it. So good.

And the DDH? We all know that vegetarian recipes have to garner his approval if I want to make them again for general consumption. Luckily, he likes lentils (though not raw onion, oops), and lentils are filling and chewy enough to make up for meat. He ate a big bowl and expressed his approval (except for the raw onions). Success!

Wednesday, July 11, 2012

Easy American Pad Thai

I'm a big fan of Fake Asian food.

You know what I mean. I'm sure actual people who live in China or Thailand or India or wherever don't eat anything resembling the sorts of food that I make and call Chinese or Thai or Indian or Generic Asian. I have Chinese coworkers and I know that at home they eat fish heads and chicken feet and foods much spicier than you'll ever find on my table.

But Americanized Asian food is delicious (perhaps fish heads and chicken feet are delicious too; to be fair, I've never tried them). I keep a lot of staple ingredients for these cuisines stocked because I use them frequently, and because Asian Mart (yes, that's the actual name of the store) is a strange and fascinating fish-scented wonderland full of odd ingredients, Pocky, and boba tea.

That said, perhaps not every American stocks her kitchen with fish sauce and curry paste and sambal oelek.

I have made more complicated Pad Thais (Pads Thai?) before, recipes that rely extensively on my stock of ingredients in labels that are mostly in Thai and include only limited and hilarious English captions. They are tasty, and they are not any more difficult to cook than this recipe. They just require more--and less common--ingredients.

The recipe I adapted for this Pad Thai dish, however, assumes that you have nothing more exotic than soy sauce in your pantry (well, and rice noodles). I added a touch or two of other ingredients because I had them on hand, but if you're scared off by the mention of fish sauce, follow the link to Brownies for Dinner for the original recipe, where you'll find an Americanized Pad Thai that's easy, delicious, and does not require a trip to Asian Mart.

Ironically, I did not have on hand two pretty common American ingredients: cilantro and green onions. We just got back from vacation and I don't have much of anything green on hand, and the cilantro I planted died months ago. The DDH doesn't particularly care for green onions or cilantro, so he was happy, but I love them and definitely recommend the greened version of this meal.

Easy American Pad Thai.

Easy American Pad Thai
Adapted from this recipe by Patricia at Brownies for Dinner.

Note: If you'd like to add chicken or pork to your Pad Thai, skip down, put together a batch of the sauce, and start your meat marinating before proceeding with the recipe. You don't have to marinate the meat, but it does make it tasty! Cook and set aside, then add to the noodles at the end of their cooking time.

First, you need about 8 oz. rice noodles. These come in two kinds: skinny round ones sort of like angel hair pasta, and wide flat ones. You want the wide flat ones if you have any sort of a choice.

Skinny on the left; wide on the right.
Now, I was almost out of the wide ones, did not have time to go to Asian Mart, and the local grocery store only carried the skinny kind. So I can testify that they will work. They just get mushier, and I prefer the taste and mouthfeel of the wider noodle for a Pad Thai.

Heck, if you're desperate and/or adventurous, you could use normal white flour linguine. It'll taste different than rice noodles and have a different texture, but why the heck not, right?

Prepare your noodles according to package directions. Typically, this means soaking your noodles in hot or cold water for about thirty minutes. If your package directions are in Thai and you don't read Thai, soak them in hot hot tap water for 25 minutes. If you're using skinny noodles and it calls for a soak, then a boil, skip the boiling step. You will note the mushfest in the final pictures. This is because I did not skip the boiling step. You've been warned.

White on white on white. Great picture, huh?
I also pulled out some fully cooked shrimp and set them to defrost. This dish is great with shrimp or chicken. If you're using raw shrimp or chicken, you will want to cook and set aside before you begin cooking the sauce and noodles, then stir in at the end when I add my already-cooked shrimp.

Scramps.
While the noodles soak, prep your ingredients and mix your sauce.

You will want about 1/4 cup peanuts (unless of course you're allergic to peanuts). These are to top your final dish. The DDH doesn't like them. You can buy chopped ones, or buy whole ones and chop them yourself.

Chopped peanuts.
Note: If you had whole shelled peanuts (i.e., still with skins), chop them with skins on. Then, blow lightly on the peanut pile. Most of the skins will float away off your cutting board, while the peanuts stay in place. Pick up your cutting board and brush all the skins into the trash or your compost bowl. Ta-da! It won't get quite all of them, but it's much easier than trying to pick out each individual skin with your fingers.

Set the chopped peanuts aside. At this time, also chop your 1/2 cup fresh cilantro, if using, and set aside as well.

In a small bowl, mix 2 Tbs. brown sugar,

juice of 1 small lime,

About 2 Tablespoons juice.
and 3 Tablespoons soy sauce. Or, if you happen to have some on hand, use 1 1/2 Tablespoons soy sauce and scant Tablespoon fish sauce.

Sauce de Poisson. I promise that doesn't mean "poison."

Now, spice it up. A dash or two of Sriracha would be marvelous. The Roommate kept giant bottles of Sriracha on hand and I used to borrow the occasional dash for my cooking, but now that he has moved out, I obviously need to invest in my own. Chile paste would work, or even a sprinkling of chili powder or cayenne. I used 1/4 teaspoon Sambal Oelek, but this was not enough spice for us (read: neither the DDH nor I could taste it). I advise starting with a little of whatever spice you use and increasing it until it's at your comfort level.

The seeds are the spicy bits.

Not sure what the rooster has to do with anything.
At this point, I tossed my shrimps in the sauce to marinate a bit first and soak up the flavor.

Nom nom nom.
If you're using green onions, take 3 green onions, cut off the ends, and cut the white parts away from the green parts. Then thinly slice the white parts and cut the green parts into two-inch ribbons. Set aside.

In a small bowl, beat 2 eggs.

No need to break out the beater; a fork will do fine.
 Please note that the original recipe calls for 1 clove garlic. Here is how much garlic I used:

Again with the white on white, sorry.
and I still didn't really taste a particularly garlic flavor. Keep this in mind whenever I give recipes using garlic around here....

Anyway, peel your garlic and either mince it or have it ready for crushing through your garlic press.

Your noodles should be done about now; if not, take a break until they are. Once done soaking, drain the noodles and set aside. Remember that if your noodle directions call for boiling, you probably want to skip the boiling step.

Heat 1 Tablespoon olive oil (or sesame or peanut oil, if you'd like to be more Asian about it) in a large pan. Make sure you have all your other ingredients ready to go.

Add your minced garlic (and the white parts of the green onions, if using) to the hot pan. Cook, stirring, until fragrant, about 30 seconds.

See how it's starting to brown? Add the eggs just before you
get to that point. Photographing the process leads too
often to burnt garlic.
Add your eggs and cook until just starting to set, about one minute.

You could cook yours less than this, but I needed to make
sure they were hard cooked, since I'm pregnant.
Remove the eggs from heat and set aside (I set them in the now-empty bowl the noodles had soaked in).

To the pan, add your noodles, the green parts of your green onions, your sauce, and any cooked meat you're using.

The sauce and the shrimp all came in together.
Stir until the noodles are soft and everything's mixed together, about one minute. You may need to gently separate your noodles with your spatula (if possible; obviously my boiled skinny noodles became a mushy mess).

Shrimp mush.
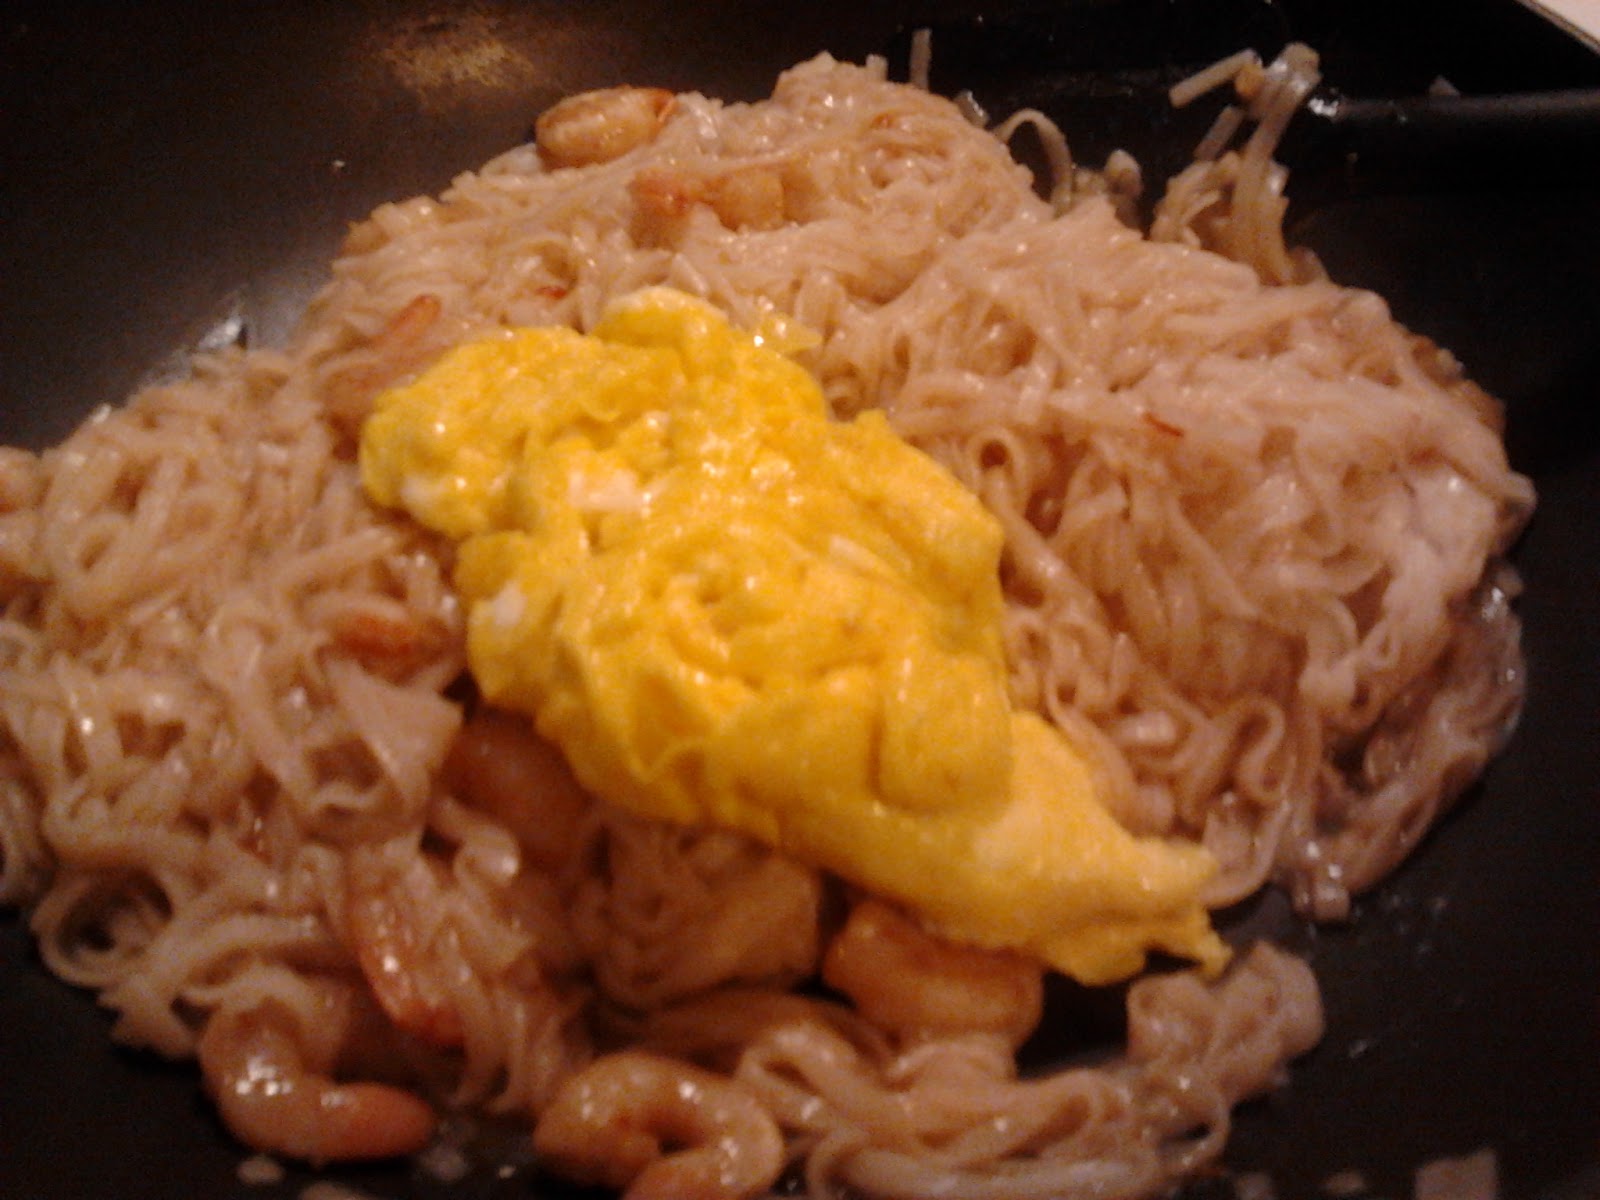
Add the eggs to the pan.

Toss and stir to break up the eggs and mix everything together.

Ta-da! All done. Serve with a lime wedge and topped with the chopped peanuts and maybe some fresh cilantro.

The End.
Okay, so the directions are really long with all those pictures, but I promise it's a very, very simple recipe. Mostly you're just soaking, mixing, and quickly cooking! It's hard to go too wrong here.

 Enjoy!

Categories

almonds (2) apples (1) Asian (2) asparagus (2) avocados (1) bacon (8) baked (11) beans (3) beef (9) berries (4) bok choy (1) bread (7) breakfast (11) broccoli (3) budget (43) butternut squash (3) cabbage (2) cake (1) caramel (2) carrot (10) cheap (46) cheating (11) cheese (12) chicken (11) Chinese food (3) chipotle (1) chocolate (6) cookies (1) cooking rules (18) corn (4) cranberries (1) cream (3) cream cheese (2) crockpot (2) cucumber (1) dairy free (4) dessert (10) dipping sauces (3) dried beans (2) eggs (11) experiments (2) fast (40) fish (1) from scratch (41) garden (15) garlic (22) gluten free (5) grain free (3) green beans (2) greens (5) grilling (4) grocery shopping (8) healthy (32) homegrown (7) honey (8) Indian food (2) jalepeno (6) lemon (8) lentils (1) lettuce (3) lime (3) make ahead (6) Mexican (5) milk (3) oats (2) onion (12) orange (4) paella (1) pasta (11) pasta sauces (10) peanuts (1) pecans (1) pork (4) potato (6) pumpkin (2) quick sides (7) quick version (7) reality bites (14) rice (6) rice noodles (1) roasted (1) sage (1) salad (5) sausage (4) shrimp (4) simple (54) snacks (6) soup (5) sourdough (1) spinach (1) spring (4) sriracha (2) summer (11) summer squash (7) sweet potatoes (6) teriyaki (1) the DDH cooks (13) tomatoes (16) tortillas (5) vegetarian (24) winter (11) winter squash (2) zucchini (7)